When upgrading database to new version, required to do this migration of autoconfig on to the new Oracle Home. I have summarized the steps involving in this process as:
1. Copy AutoConfig to the RDBMS ORACLE_HOME
Update the RDBMS ORACLE_HOME file system with the AutoConfig files by performing the following steps:
On the Application Tier (as the APPLMGR user):
Log in to the APPL_TOP environment (source the environment file)
Create appsutil.zip file
perl < AD_TOP>/bin/admkappsutil.pl
This will create appsutil.zip in $APPL_TOP/admin/out .
On the Database Tier (as the ORACLE user):
Copy or FTP the appsutil.zip file to the < RDBMS ORACLE_HOME>
cd < RDBMS ORACLE_HOME>
unzip -o appsutil.zip
2. Generate your Database Context File
If you already have a Database Context File, go to Task 3 in this section.
If your Applications system was created with the Release 11.5.8 Rapid Install or earlier, execute the following commands to create your Database Context File:
On UNIX
cd < RDBMS ORACLE_HOME>
. < CONTEXT_NAME>.env
cd < RDBMS ORACLE_HOME>/appsutil/bin
perl adbldxml.pl tier=db appsuser=< APPSuser>
On Windows
Source the .cmd file using < RDBMS ORACLE_HOME>\< CONTEXT_NAME>.cmd
cd /d < RDBMS ORACLE_HOME>\appsutil\bin
perl adbldxml.pl tier=db appsuser=< APPSuser>
Attention: adbldxml uses your current environment settings to generate the context file. Therefore ensure that your environment is correctly sourced.
3. Generate and Apply AutoConfig Configuration files
Attention: This step performs the conversion to AutoConfig. Once completed, the previous configuration will not be available.
Attention: The database server and the database listener must remain available during the AutoConfig run. All the other database tier services should be shut down.
Execute the following commands:
On UNIX
cd < RDBMS ORACLE_HOME>/appsutil/bin
adconfig.sh contextfile=< CONTEXT>
On Windows
cd /d < RDBMS ORACLE_HOME>\appsutil\bin
adconfig.cmd contextfile=< CONTEXT>
Warning: Running AutoConfig on the database node will update the RDBMS network listener file. Be sure to review the configuration changes from step 3. The new AutoConfig network listener file supports the use of IFILE to allow for values to be customized or added as needed.
Note: Running AutoConfig on the database tier will NOT overwrite any existing init.ora file in the < ORACLE_HOME>/dbs directory. If no init.ora file exists in your instance, AutoConfig will generate an init.ora file in the < ORACLE_HOME>/dbs directory for you.
On Windows platform, during each AutoConfig run the init.ora file in < ORACLE_HOME>/dbs directory is copied over to < ORACLE_HOME>/database directory.
Note: Running AutoConfig might change your existing environment files. After running AutoConfig, you should always set the environment before you run any Applications utilities in order to apply the changed environment variables.
Monday, 31 May 2010
Sunday, 30 May 2010
AutoConfig Tool to Generate the Context File on the Database Tier - R12 adbldxml.pl
The adbldxml Utility in R12 supports only on the Database Tier, if you try with application tier will get "Incorrect environment file sourced. Unset apps environment and source RDBMS oracle home environment file". Because adbldxml utility, can be used to create a new context file on the database tier alone.
The AutoConfig Build Context utility has been revived and re-introduced in Oracle E-Business Suite R12 for the database tier. It is essential for enabling AutoConfig on the database tier and this utility facilitates and simplifies database upgrades and cross platform migration.
Invoke adbldxml.pl from Database Tier only. A new context file on the database tier can be created using the following command :
perl $ORACLE_HOME/appsutil/bin/adbldxml.pl [template=< contextfile_template>][out=< contextfile_name>
Where is the location of the context template (default is $ORACLE_HOME/appsutil/template/adxdbctx.tmp) and < contextfile_name> is the absolute Path of the context file to be generated (the default is $ORACLE_HOME/appsutil/< context_name>.xml).
In Release 11i, there was an Option called 'Tier'. This Option has now been removed -- tier= < tiertype> ( { apps(default) | db } )
In case if the utility is invoked from Applications Tier , The below error is encountered.
ERROR (when invoked from Apps-Tier) :
Incorrect environment file sourced. Unset apps environment and source RDBMS oracle home environment file.
Generate a new Context file on the Applications Tier
In order to generate the Applications context file on Applications tier, run the adclonectx.pl script.
To retrieve the applications tier context file ( if it is lost or deleted accidentally) , execute the following command on the applications tier :
perl < COMMON_TOP>/clone/bin/adclonectx.pl retrieve
The AutoConfig Build Context utility has been revived and re-introduced in Oracle E-Business Suite R12 for the database tier. It is essential for enabling AutoConfig on the database tier and this utility facilitates and simplifies database upgrades and cross platform migration.
Invoke adbldxml.pl from Database Tier only. A new context file on the database tier can be created using the following command :
perl $ORACLE_HOME/appsutil/bin/adbldxml.pl [template=< contextfile_template>][out=< contextfile_name>
Where
In Release 11i, there was an Option called 'Tier'. This Option has now been removed -- tier= < tiertype> ( { apps(default) | db } )
In case if the utility is invoked from Applications Tier , The below error is encountered.
ERROR (when invoked from Apps-Tier) :
Incorrect environment file sourced. Unset apps environment and source RDBMS oracle home environment file.
Generate a new Context file on the Applications Tier
In order to generate the Applications context file on Applications tier, run the adclonectx.pl script.
To retrieve the applications tier context file ( if it is lost or deleted accidentally) , execute the following command on the applications tier :
perl < COMMON_TOP>/clone/bin/adclonectx.pl retrieve
Saturday, 29 May 2010
Running Perl adcfgclone.pl Database Results In -Rmanstage Usage Error - R12.0.6
While attempting to clone to the 12.0.6 Test instance machine, the following error occurs.
Run the adupdlib.sql script against target database.
When running the "perl adcfgclone.pl dbconfig $ORACLE_HOME/appsutil/dba12_ltcsd141.xml", getting Error related to -rmanstage:
/ appsutil/clone -rmanstage -rmantgtloc -srcdbname -showProgress -e
/d25/app/oracle/dba12/10.2.0/appsutil/dba12_ltcsd141.xml
-stage
/d25/app/oracle/dba12/10.2.0/appsutil/clone
-rmanstage
-rmantgtloc
-srcdbname
-showProgress
Option -rmanstage can only appear once"
### File/script version or Patch level and number? ###
adcfgclone Version 120.20.12000000.12
The reason for this problem
The variable rmanstage is called twice.
Bug 7364547 fixed in AD bin adclone.pl 120.26.12000000.16
To implement the solution, please execute the following steps:
Download and apply The Patch 7699109 to source system.
Patch will provide adclone.pl 120.26.12000000.16
Redo the cloning steps, including The preclone.
Friday, 28 May 2010
*.t files filling up the $APPLTMP directory in R12
Oracle Applications will create temp files for several reasons:
- spool print jobs
- buffer large selects, etc.
Normally theses files will be deleted automatically but when the client crashes theses files persist.
The only solution is to monitor the tmp directory and delete the files manually or by a script if necessary.
You may also try this:
Use System Administrator responsibility,
Navigate > Install > Printer Driver > Define
Under the 'Spool File', change 'Yes' to 'No'.
This prints the initial print to the out directory instead of printing it to the temp directory and invokes the utility to clean up the temp files.
FNDCPASS Fails to Change Password with 11G Database
Found that, FNDCPASS fail to change the password for APPLSYS/APPS after upgrading to 12.0 and database from 10.2.0.2 to 11.1.0.6
Solution to the issue,
The database SEC_CASE_SENSITIVE_LOGON parameter defaults to TRUE. When this occurs the password sensitivity conversion does not occur. Passwords that are input as lower case are automatically updated as upper case. As a workaround set the parameter to FALSE in the init.ora, run autoconfig on application tiers and bounce the database.
Thursday, 27 May 2010
Unable To Create New Document In Web Adi. "Verifying.." screen hangs
When creating document through Excel 2003 for General Ledger Journals, there is an issue with Web ADI.
ADI version: 11.5.10.0 to 11.5.10.0 - Release: 11.5 to 11.5
Create Document
Viewer: excel 2003
Reporting: no
Integrator: General Ledger - Journals
Layout Functional Actuals - Single
Content: none
File Download screen comes up, click open.
Security Warning screen comes up, click Enable Macros
Screen that says:
Verifying ...t.template.BneTemplateService from rgts...
The lines that indicate the application is working keep scrolling accross the screen and this does not end.There are open, open folder and cancel buttons but they are not available.
Solution to the above issue,
Confirm that the Applications Host is running in the Local Intranet or Trusted security domains (shown in the second last cell of the IE status bar when walking through the Create Document page flow). If they are not, please correct via correct configuration of the PC/Browser network settings. Then retest.
Check the security setting for the zone the host is in(Tools > Internet Options > Security) for the setting of the Scripting property "Allow status bar updates via script". If its Disabled, please Enable.
Restart Internet Explorer. Retest the issue.
EBS 11i and R12 certified with DB 11gR2 11.2.0.1 on Windows
Oracle Database 11g Release 2 (11gR2) version 11.2.0.1 is now certified with Oracle E-Business Suite 11i and 12 on the following Microsoft Windows Server (32-bit) and Windows x64 (64-bit) operating systems..
Read more from Mr. Steven Chang blog
EBS 11i and R12 certified with DB 11gR2 11.2.0.1 on Windows
Cheers!!!
Read more from Mr. Steven Chang blog
EBS 11i and R12 certified with DB 11gR2 11.2.0.1 on Windows
Cheers!!!
Standard API to Disable or End Date Responsibility
The delete responsibility happens by adding the end date.
Therefore, first query fnd_user_resp_groups_direct to get the start_date for the existing assignment.
Then use the following API to end date it.
One concern is the user could see the changes are not getting reflected immediately when queried on User Define Form.
These processes are deferred at the workflow level of processing. It should be no longer than a couple minutes before the changes are reflected in the define users (FNDSCAUS) form.
Therefore, first query fnd_user_resp_groups_direct to get the start_date for the existing assignment.
Then use the following API to end date it.
x.user_id, x.responsibility_id,
x.RESPONSIBILITY_APPLICATION_ID))
then
fnd_user_resp_groups_api.update_assignment(
user_id => x.user_id,
responsibility_id => x.responsibility_id,
responsibility_application_id => x.RESPONSIBILITY_APPLICATION_ID,
start_date => x.start_date,
end_date => sysdate,
description => null);
end if;
One concern is the user could see the changes are not getting reflected immediately when queried on User Define Form.
These processes are deferred at the workflow level of processing. It should be no longer than a couple minutes before the changes are reflected in the define users (FNDSCAUS) form.
Script to check what ATG/Workflow related patches are installed in e-business suite
This script will help you to check what ATG/Workflow related patches are installed in 11i and R12
SELECT BUG_NUMBER,
LAST_UPDATE_DATE,
DECODE (
bug_number,
2728236,
'OWF.G INCLUDED IN 11.5.9',
3031977,
'POST OWF.G ROLLUP 1 - 11.5.9.1',
3061871,
'POST OWF.G ROLLUP 2 - 11.5.9.2',
3124460,
'POST OWF.G ROLLUP 3 - 11.5.9.3',
3126422,
'11.5.9 Oracle E-Business Suite Consolidated Update 1',
3171663,
'11.5.9 Oracle E-Business Suite Consolidated Update 2',
3316333,
'POST OWF.G ROLLUP 4 - 11.5.9.4.1',
3314376,
'POST OWF.G ROLLUP 5 - 11.5.9.5',
3409889,
'POST OWF.G ROLLUP 5 Consolidated Fixes For OWF.G RUP 5',
3492743,
'POST OWF.G ROLLUP 6 - 11.5.9.6',
3868138,
'POST OWF.G ROLLUP 7 - 11.5.9.7',
3262919,
'FMWK.H',
3262159,
'FND.H INCLUDE OWF.H',
3258819,
'OWF.H INCLUDED IN 11.5.10',
3438354,
'11i.ATG_PF.H INCLUDE OWF.H',
3140000,
'ORACLE APPLICATIONS RELEASE 11.5.10 MAINTENANCE PACK',
3240000,
'11.5.10 ORACLE E-BUSINESS SUITE CONSOLIDATED UPDATE 1',
3460000,
'11.5.10 ORACLE E-BUSINESS SUITE CONSOLIDATED UPDATE 2',
3480000,
'ORACLE APPLICATIONS RELEASE 11.5.10.2 MAINTENANCE PACK',
4017300,
'ATG_PF:11.5.10 Consolidated Update (CU1) for ATG Product Family',
4125550,
'ATG_PF:11.5.10 Consolidated Update (CU2) for ATG Product Family',
5121512,
'AOL USER RESPONSIBILITY SECURITY FIXES VERSION 1',
6008417,
'AOL USER RESPONSIBILITY SECURITY FIXES 2b',
6047864,
'REHOST JOC FIXES (BASED ON JOC 10.1.2.2) FOR APPS 11i',
4334965,
'11i.ATG_PF.H RUP3',
4676589,
'11i.ATG_PF.H.RUP4',
5473858,
'11i.ATG_PF.H.RUP5',
5903765,
'11i.ATG_PF.H.RUP6',
6241631,
'11i.ATG_PF.H.RUP7',
4440000,
'Oracle Applications Release 12 Maintenance Pack',
5082400,
'12.0.1 Release Update Pack (RUP1)',
5484000,
'12.0.2 Release Update Pack (RUP2)',
6141000,
'12.0.3 Release Update Pack (RUP3)',
6435000,
'12.0.4 RELEASE UPDATE PACK (RUP4)',
5907545,
'R12.ATG_PF.A.DELTA.1',
5917344,
'R12.ATG_PF.A.DELTA.2',
6077669,
'R12.ATG_PF.A.DELTA.3',
6272680,
'R12.ATG_PF.A.DELTA.4',
7237006,
'R12.ATG_PF.A.DELTA.6',
6728000,
'12.0.6 RELEASE UPDATE PACK (RUP6)',
7303030,
'12.1.1 Maintenance Pack',
7651091,
'Oracle Applications Technology Release Update Pack 2 for 12.1 (R12.ATG_PF.B.DELTA.2)',
7303033,
'Oracle E-Business Suite 12.1.2 Release Update Pack (RUP2)',
bug_number
)
bug,
ARU_RELEASE_NAME
FROM AD_BUGS b
WHERE b.BUG_NUMBER IN
('2728236',
'3031977',
'3061871',
'3124460',
'3126422',
'3171663',
'3316333',
'3314376',
'3409889',
'3492743',
'3262159',
'3262919',
'3868138',
'3258819',
'3438354',
'3240000',
'3460000',
'3140000',
'3480000',
'4017300',
'4125550',
'6047864',
'6008417',
'5121512',
'4334965',
'4676589',
'5473858',
'5903765',
'6241631',
'4440000',
'5082400',
'5484000',
'6141000',
'6435000',
'5907545',
'5917344',
'6077669',
'6272680',
'7237006',
'6728000',
'7303030',
'7651091',
'7303033')
ORDER BY BUG_NUMBER, LAST_UPDATE_DATE, ARU_RELEASE_NAME;
Cheers!
Db Linksare Lost After Changing Apps User Password FNDCPASS
After changing the Apps password using FNDCPASS, DB_Link gets invalid.
When you changed the apps password then all the db links should have the new APPS password, run the AutoConfig after changing the APPS password and this will update all, please note that there is no need to run adautoconfig each time you use FNDCPASS, only if you are changing any of the following users:
APPLSYS
APPS
APPS_MRC
APPLSYSPUB
PORTAL30 & PORTAL30_SSO
In case you are using Oracle Login Server and Portal 3.0.9 with E-Business Suite 11i
How to disable the Personal Profiles Form
1.As System Administrator Navigate to Security->Responsibility->Define.
2. Query up the responsibility assigned to the user .
3. Navigate to the Menu Exclusions tab.
4. In the type field choose "Function" and in the name choose "Profile User Values" FND_FNDPOMSV.
5. Save the changes.
6. Exit and enter the application again as the responsibility just modified.
7. Now you will see the Edit -> Preferences -> Profiles dimmed.
How to Change Applications R12 Passwords using Applications Schema Password Change Utility (FNDCPASS)
Oracle Applications provides a command line utility, FNDCPASS, to change/reset Oracle Applications schema passwords. This utility changes the password registered in Oracle Applications tables, changes the schema password in the database and can also change user passwords.
Note: You cannot change a schema name, such as APPLSYS or GL, after a product is installed, with FNDCPASS. Ensure that the entire Oracle Applications system has been shut down before changing any schema passwords. All users should log out and the Applications system should be down before running this utility.
If Oracle Applications user passwords are being changed then the relevant users should not be logged in.
Before changing any passwords, you should make a backup of the tables FND_USER and FND_ORACLE_USERID
A). To change the APPS and APPLSYS schema password:
Use the following command to change passwords for schemas that are used by shared components of Oracle Applications.
FNDCPASS < logon > 0 Y < system/password> SYSTEM < username > < new_password>
FNDCPASS uses the following arguments when changing the APPLSYS password. When specifying the SYSTEM token, FNDCPASS expects the next arguments to be the APPLSYS username and the new password.
Validates APPLSYS.
Re-registers password in Oracle Applications.
Changes the APPLSYS and all APPS passwords (for multi-APPS schema installations) to the same password.
Because everything with a Privilege Level [set to any of ('E', 'U', 'D')] in the FND_ORACLE_USERID table must always have the same password, FNDCPASS updates these passwords as well as APPLSYS's password.
For example, the APPS password will be updated when the APPLSYS password is changed.
ALTER USER is executed to change the ORACLE password for the above ORACLE users.
For instance, the following command changes the APPLSYS password to 'WELCOME'.
FNDCPASS apps/apps 0 Y system/manager SYSTEM APPLSYS WELCOME
Note: The SYSTEM token is used when changing the APPLSYS password.
B). To change an Oracle Applications schema password (other than APPS/APPLSYS):
Use this command to change the password of a schema provided by an individual product in Oracle Applications.
FNDCPASS 0 Y ORACLE < username> < new_password>
Note: The ORACLE token is used when changing an Oracle Applications schema password.
Use the above command with the following arguments. When specifying the ORACLE token, FNDCPASS expects the next arguments to be an ORACLE username and the new password.
FNDCPASS apps/apps 0 Y system/manager ORACLE GL GL1
C). To change all ORACLE schema passwords:
Use this command to change the passwords of all schemas provided by Oracle Applications products.
FNDCPASS < logon> 0 Y < system/password> ALLORACLE < new_password>
Use the above command with the following arguments. When specifying the ALLORACLE token, FNDCPASS expects the next argument to be the new password.
FNDCPASS apps/apps 0 Y system/manager ALLORACLE WELCOME
Note: The ALLORACLE token is used when changing all ORACLE schema passwords.
D). To change an Oracle Applications user's password:
Use this command to change an individual Oracle Applications user's password.
FNDCPASS < logon> 0 Y < system/password> USER < username> < new_password>
Note: The USER token is used when changing an Oracle Applications user password.
Use the above command with the following arguments. When specifying the USER token, FNDCPASS expects the next arguments to be an Oracle Applications username and the new password.
FNDCPASS apps/apps 0 Y system/manager USER VISION WELCOME
Using the FNDCPASS Utility:
Here is an example of changing an Oracle user's password, where is the Oracle schema name.
1. Use the FNDCPASS utility to change the password.
FNDCPASS < APPS username>/< APPS password> 0 Y \
< SYSTEM username>/< SYSTEM password> ORACLE < username> < new_password>
When changing the APPS or APPLSYS passwords, replace ORACLE with SYSTEM.
Note: Passwords for APPLSYS and the APPS schemas -- including the MRC schema -- must be the same. If you change the password for one, FNDCPASS automatically changes the others.
2. Update configuration files.
If you changed the APPS schema password (and APPLSYS) or the APPLSYSPUB password, update the following configuration files using AutoConfig (do not manually edit these files). They are used when connecting to Oracle Applications.
If you changed the APPS (and APPLSYS) password, update the password in this file:
• ORACLE_HOME/reports/server/CGIcmd.dat
If you changed the APPLSYSPUB password, update the password in these files:
• FND_TOP/resource/appsweb.cfg
• OA_HTML/bin/appsweb.cfg
• INST_TOP/admin/fnd/12.0.0/secure/< host_name>_< dbname>.dbc
Note: When changing APPS (or APPLSYS) and APPLSYSPUB passwords, do not restart the system until the entire password change process has been completed
3. Verify the new password.
If you changed the password for APPS (and APPLSYS), restart all concurrent managers, then log on to Oracle Applications to test the new password.
Note: You cannot change a schema name, such as APPLSYS or GL, after a product is installed, with FNDCPASS. Ensure that the entire Oracle Applications system has been shut down before changing any schema passwords. All users should log out and the Applications system should be down before running this utility.
If Oracle Applications user passwords are being changed then the relevant users should not be logged in.
Before changing any passwords, you should make a backup of the tables FND_USER and FND_ORACLE_USERID
A). To change the APPS and APPLSYS schema password:
Use the following command to change passwords for schemas that are used by shared components of Oracle Applications.
FNDCPASS < logon > 0 Y < system/password> SYSTEM < username > < new_password>
FNDCPASS uses the following arguments when changing the APPLSYS password. When specifying the SYSTEM token, FNDCPASS expects the next arguments to be the APPLSYS username and the new password.
- logon - The Oracle username/password.
- system/password - The username and password for the SYSTEM DBA account.
- username - The APPLSYS username. For example, 'applsys'.
- new_password - The new password.
Validates APPLSYS.
Re-registers password in Oracle Applications.
Changes the APPLSYS and all APPS passwords (for multi-APPS schema installations) to the same password.
Because everything with a Privilege Level [set to any of ('E', 'U', 'D')] in the FND_ORACLE_USERID table must always have the same password, FNDCPASS updates these passwords as well as APPLSYS's password.
For example, the APPS password will be updated when the APPLSYS password is changed.
ALTER USER is executed to change the ORACLE password for the above ORACLE users.
For instance, the following command changes the APPLSYS password to 'WELCOME'.
FNDCPASS apps/apps 0 Y system/manager SYSTEM APPLSYS WELCOME
Note: The SYSTEM token is used when changing the APPLSYS password.
B). To change an Oracle Applications schema password (other than APPS/APPLSYS):
Use this command to change the password of a schema provided by an individual product in Oracle Applications.
FNDCPASS
Note: The ORACLE token is used when changing an Oracle Applications schema password.
Use the above command with the following arguments. When specifying the ORACLE token, FNDCPASS expects the next arguments to be an ORACLE username and the new password.
- logon - The Oracle username/password.
- system/password - The username and password for the SYSTEM DBA account.
- username - The Oracle username. For example, 'GL'.
- new_password - The new password.
FNDCPASS apps/apps 0 Y system/manager ORACLE GL GL1
Use this command to change the passwords of all schemas provided by Oracle Applications products.
FNDCPASS < logon> 0 Y < system/password> ALLORACLE < new_password>
Use the above command with the following arguments. When specifying the ALLORACLE token, FNDCPASS expects the next argument to be the new password.
- logon - The Oracle username/password.
- system/password - The username and password for the SYSTEM DBA account.
- new_password - The new password.
FNDCPASS apps/apps 0 Y system/manager ALLORACLE WELCOME
Note: The ALLORACLE token is used when changing all ORACLE schema passwords.
Use this command to change an individual Oracle Applications user's password.
FNDCPASS < logon> 0 Y < system/password> USER < username> < new_password>
Note: The USER token is used when changing an Oracle Applications user password.
Use the above command with the following arguments. When specifying the USER token, FNDCPASS expects the next arguments to be an Oracle Applications username and the new password.
- logon - The Oracle username/password.
- system/password - The username and password for the System DBA account.
- username - The Oracle Applications username. For example, 'VISION'.
- new_password - The new password.
FNDCPASS apps/apps 0 Y system/manager USER VISION WELCOME
Using the FNDCPASS Utility:
Here is an example of changing an Oracle user's password, where
1. Use the FNDCPASS utility to change the password.
FNDCPASS < APPS username>/< APPS password> 0 Y \
< SYSTEM username>/< SYSTEM password> ORACLE < username> < new_password>
When changing the APPS or APPLSYS passwords, replace ORACLE with SYSTEM.
Note: Passwords for APPLSYS and the APPS schemas -- including the MRC schema -- must be the same. If you change the password for one, FNDCPASS automatically changes the others.
If you changed the APPS schema password (and APPLSYS) or the APPLSYSPUB password, update the following configuration files using AutoConfig (do not manually edit these files). They are used when connecting to Oracle Applications.
If you changed the APPS (and APPLSYS) password, update the password in this file:
• ORACLE_HOME/reports/server/CGIcmd.dat
If you changed the APPLSYSPUB password, update the password in these files:
• FND_TOP/resource/appsweb.cfg
• OA_HTML/bin/appsweb.cfg
• INST_TOP/admin/fnd/12.0.0/secure/< host_name>_< dbname>.dbc
Note: When changing APPS (or APPLSYS) and APPLSYSPUB passwords, do not restart the system until the entire password change process has been completed
If you changed the password for APPS (and APPLSYS), restart all concurrent managers, then log on to Oracle Applications to test the new password.
Wednesday, 26 May 2010
Premier Support for EBS 11i ends November 2010...
Oracle E-Business Suite Release 11i version 11.5.10, the impending end of Premier Support this year on November 30, 2010. If you want to know the differences between Premier, Extended and Sustaining Support coverage in depth, please check with Mr. Steven Chang's latest blog from 26-May-2010.
Reminder: Premier Support for EBS 11i ends November 2010
Reminder: Premier Support for EBS 11i ends November 2010
What is FNDLOAD and what it is used for ?
FNDLOAD is a concurrent program that can move Oracle Applications data between database and text file. FNDLOAD can download data from an application entity into an editable text file, which can be uploaded to another database. Conversion between database format and text file format is specified by a configuration file.
Oracle currently supports the migration of the following types of data using FNDLOAD
- Printers / Print queues / Executables Printers / Print queues / Executables.
- Roles / Responsibilities / Forms Roles / Responsibilities / Forms.
- Menus / Users / Request Sets Menus / Users / Request Sets.
- Request Groups / Request Queues Request Groups / Request Queues.
- Work shifts / Programs / Libraries Work shifts / Programs / Libraries.
- Attachments / Help Files Attachments / Help Files.
- Mime Types Mime Types.
- Security Information.
.ldt & .lct stands for Loader datafile & Loader configuration files, used frequently in migrating customization, profile options, configuration data, etc.. across Instances.
Advantages when using FNDLOAD
Disadvantages
The Syntax
To use FNDLOAD, the following syntax is needed.
FNDLOAD apps/appspwd 0 Y mode configfile datafile entity [parameter1.....]
0 & Y are flags for FND Executable like FNDCPASS & FNDLOAD where
Example of download:
FNDLOADapps/pwd 0 Y DOWNLOAD ${FND_TOP}/patch/115/import/afcpprog.lct myfile.ldt \ PROGRAM CONCURRENT_PROGRAM_NAME= concurrent_program_short_name> APPLICATION_SHORT_NAME=application_short_name
Example of Upload
FNDLOAD apps/pwd 0 Y UPLOAD ${FND_TOP}/patch/115/import/afcpprog.lct myfile.ldt – CUSTOM_MODE=FORCE undocumented parameter
Where is Config File Located
Configuration files with extension .lct
On linux – all the configuration files are in $FND_TOP/patch/115/import directory
On linux Oracle also places the original configuration files in $FND_TOP/admin/import directory
Data files with extension .ldt
The configfiles (.lct) are delivered and maintained by Oracle
It has entity definitions, parent-child relationships and user input parameters identified by :NAME
Downloading a parent automatically downloads all children – (Example) Concurrent Program download
Working example for these code objects :
Printer Styles
FNDLOAD apps/apps@seed115 O Y DOWNLOAD $FND_TOP/patch/115/import/afcppstl.lct file_name.ldt STYLE PRINTER_STYLE_NAME=printer style name
Lookups
FNDLOAD apps/apps@seed115 O Y DOWNLOAD $FND_TOP/patch/115/import/aflvmlu.lct file_name.ldt FND_LOOKUP_TYPE APPLICATION_SHORT_NAME=prod LOOKUP_TYPE=lookup name
Descriptive Flexfield with all of specific Contexts
$ FNDLOAD apps/ 0 Y DOWNLOAD $FND_TOP/patch/115/import/afffload.lct XX_PO_HEADERS_DFF.ldt DESC_FLEX APPLICATION_SHORT_NAME=PO DESCRIPTIVE_FLEXFIELD_NAME='PO_HEADERS'
Please note that PO is the Application Shortname against which descriptive flexfield against PO Headers is registered
PO_HEADERS is the name of Descriptive Flexfield against PO Headers
You can find the details using this script
SELECT application_id, DESCRIPTIVE_FLEXFIELD_NAME, application_table_name
FROM fnd_descriptive_flexs_vl
WHERE APPLICATION_TABLE_NAME like 'PO_HEAD%' ORDER BY APPLICATION_TABLE_NAME
/
To upload into another environment
$FND_TOP/bin/FNDLOAD apps/$CLIENT_APPS_PWD 0 Y UPLOAD $FND_TOP/patch/115/import/afffload.lct XX_PO_HEADERS_DFF.ldt
Concurrent Programs
$ FNDLOAD apps/ O Y DOWNLOAD $FND_TOP/patch/115/import/afcpprog.lct XX_CUST_PROG_IMP.ldt PROGRAM APPLICATION_SHORT_NAME="XX_GS_IMP" CONCURRENT_PROGRAM_NAME="XX_CUST_PROG_IMP"
Please note that XX_GS_IMP will be your custom Application Shortname where concurrent program is registered
XX_CUST_PROG_IMP Will be the name of your request group
XX_CUST_PROG_IMP.ldt is the file where concurrent program definition will be extracted to upload to the target instance
$ FNDLOAD apps/ O Y UPLOAD $FND_TOP/patch/115/import/afcpprog.lct XX_CUST_PROG_IMP.ldt
Value Sets
FNDLOAD apps/apps@seed115 O Y DOWNLOAD $FND_TOP/patch/115/import/afffload.lct file_name.ldt VALUE_SET FLEX_VALUE_SET_NAME=value set name
Value Sets with values
FNDLOAD apps/apps@seed115 O Y DOWNLOAD $FND_TOP/patch/115/import/afffload.lct file_name.ldt VALUE_SET_VALUE FLEX_VALUE_SET_NAME=value set name
Profile Options
FNDLOAD apps/apps@seed115 O Y DOWNLOAD $FND_TOP/patch/115/import/afscprof.lct file_name.ldt PROFILE PROFILE_NAME=profile option APPLICATION_SHORT_NAME=prod
Requset Group
$ FNDLOAD apps/ O Y DOWNLOAD $FND_TOP/patch/115/import/afcpreqg.lct XX_REPGROUP_NAME.ldt REQUEST_GROUP REQUEST_GROUP_NAME="XX_REPGROUP_NAME" APPLICATION_SHORT_NAME="XX_MYGROUP"
Please note that XX_MYGROUP will be your Application Shortname where request group is registered
and XX_REPGROUP_NAME Will be the name of your request group
Next need to upload this Request Group info to the target instance after having transferred the ldt file
FNDLOAD apps/ O Y UPLOAD $FND_TOP/patch/115/import/afcpreqg.lct XX_REPGROUP_NAME.ldt
Request Sets
FNDLOAD apps/apps@seed115 O Y DOWNLOAD $FND_TOP/patch/115/import/afcprset.lct file_name.ldt REQ_SET APPLICATION_SHORT_NAME=prod REQUEST_SET_NAME=request set
Responsibilities
FNDLOAD apps/apps@seed115 O Y DOWNLOAD $FND_TOP/patch/115/import/afscursp.lct file_name.ldt FND_RESPONSIBILITY RESP_KEY=responsibility
Menus
FNDLOAD apps/apps@seed115 O Y DOWNLOAD $FND_TOP/patch/115/import/afsload.lct file_name.ldt MENU MENU_NAME=menu_name
Forms/Functions
FNDLOAD apps/apps@seed115 0 Y DOWNLOAD $FND_TOP/patch/115/import/affrmcus.lct file_name.ldt FND_FORM_CUSTOM_RULES The Upload syntax for all styles: FNDLOAD apps/apps@seed115 0 Y UPLOAD $FND_TOP/patch/115/import/affrmcus.lct file_name.ldt
Responsibilities
$ FNDLOAD apps/ O Y DOWNLOAD $FND_TOP/patch/115/import/afscursp.lct XX_RESPON_NAME.ldt FND_RESPONSIBILITY RESP_KEY="XX_RESPON_NAME"
please note that XX_RESPON_NAME is the responsibility key in source instance
Now need to upload this information to target instance after having transferred the ldt file
FNDLOAD apps/ O Y UPLOAD $FND_TOP/patch/115/import/afscursp.lct XX_RESPON_NAME.ldt
Users
FNDLOAD apps/ 0 Y DOWNLOAD $FND_TOP/patch/115/import/afscursp.lct XX_FND_USER_PASSWD.ldt FND_USER USER_NAME='USER_NAME'
When you look at the ldt file, you can find this kind info, and do not worry about password, it will be encrypted only.
BEGIN FND_USER "username"
OWNER = "ANONYMOUS"
LAST_UPDATE_DATE = "2010/01/07"
ENCRYPTED_USER_PASSWORD =
"ZG19D5C2DB16C4F5DD4D5D9A2F0CE3FEEB07BAF9CD0A591B64CA8B357C38EE7B17533B0C00D1DBA278D83E0A8994737B2C63"
SESSION_NUMBER = "3375"
START_DATE = "2007/01/01"
END_DATE = "*NULL*"
LAST_LOGON_DATE = "2010/04/30"
DESCRIPTION = "Name of the user"
PASSWORD_DATE = "2010/01/07"
PASSWORD_ACCESSES_LEFT = "*NULL*"
PASSWORD_LIFESPAN_ACCESSES = "*NULL*"
PASSWORD_LIFESPAN_DAYS = "*NULL*"
EMAIL_ADDRESS = "username@test.com"
FAX = "*NULL*"
To upload the FND_USER using FNDLOAD command use
FNDLOAD apps/ 0 Y UPLOAD $FND_TOP/patch/115/import/afscursp.lct XX_FND_USER_PASSWD.ldt
when you upload the FND_USER details with FNDLOAD, need to be complete these actions priorily.
1. After uploading using FNDLOAD, user will be promoted to change their password again during their next signon attempt.
2. All the responsibilities will be extracted by FNDLOAD alongwith User Definition in FND_USER
3. In the Target Environment , make sure that you have done FNDLOAD for new responsibilities,functions, menu, request group etc., prior to running FNDLOAD on users.
Oracle currently supports the migration of the following types of data using FNDLOAD
- Printers / Print queues / Executables Printers / Print queues / Executables.
- Roles / Responsibilities / Forms Roles / Responsibilities / Forms.
- Menus / Users / Request Sets Menus / Users / Request Sets.
- Request Groups / Request Queues Request Groups / Request Queues.
- Work shifts / Programs / Libraries Work shifts / Programs / Libraries.
- Attachments / Help Files Attachments / Help Files.
- Mime Types Mime Types.
- Security Information.
.ldt & .lct stands for Loader datafile & Loader configuration files, used frequently in migrating customization, profile options, configuration data, etc.. across Instances.
Advantages when using FNDLOAD
- Because downloaded data is stored in a text file, version administration is possible
- No learning curve. this is relief for developer/dbas
- Fully supported and recommended by Oracle
- Capture the migrations in a file and use it during installations(log file).
- Pin-point when something happened and where (database) easily
- AOL data migration process is now simplified!
Disadvantages
- Applications patching mechanisms use FNDLOAD heavily possibility of negative impact is not zero
- No validation against migrating database/instance sensitive data
The Syntax
To use FNDLOAD, the following syntax is needed.
FNDLOAD apps/appspwd 0 Y mode configfile datafile entity [parameter1.....]
- The mode is either DOWNLOAD or UPLOAD.
- The configfile is the file that Fndload needs to download on upload data.
- T he data file is the output file, in which the downloaded data is written
- The entity is the entity you want to download
0 & Y are flags for FND Executable like FNDCPASS & FNDLOAD where
- 0 is request id (request ID 0 is assigned to request ID's which are not submitted via Submit Concurrent Request Form.
- 'Y' indicates the method of invocation. i.e. it is directly invoked from the command-line not from the Submit Request Form.
Example of download:
FNDLOADapps/pwd 0 Y DOWNLOAD ${FND_TOP}/patch/115/import/afcpprog.lct myfile.ldt \ PROGRAM CONCURRENT_PROGRAM_NAME= concurrent_program_short_name> APPLICATION_SHORT_NAME=application_short_name
Example of Upload
FNDLOAD apps/pwd 0 Y UPLOAD ${FND_TOP}/patch/115/import/afcpprog.lct myfile.ldt – CUSTOM_MODE=FORCE undocumented parameter
Where is Config File Located
Configuration files with extension .lct
On linux – all the configuration files are in $FND_TOP/patch/115/import directory
On linux Oracle also places the original configuration files in $FND_TOP/admin/import directory
Data files with extension .ldt
The configfiles (.lct) are delivered and maintained by Oracle
It has entity definitions, parent-child relationships and user input parameters identified by :NAME
Downloading a parent automatically downloads all children – (Example) Concurrent Program download
Working example for these code objects :
Printer Styles
FNDLOAD apps/apps@seed115 O Y DOWNLOAD $FND_TOP/patch/115/import/afcppstl.lct file_name.ldt STYLE PRINTER_STYLE_NAME=printer style name
Lookups
FNDLOAD apps/apps@seed115 O Y DOWNLOAD $FND_TOP/patch/115/import/aflvmlu.lct file_name.ldt FND_LOOKUP_TYPE APPLICATION_SHORT_NAME=prod LOOKUP_TYPE=lookup name
Descriptive Flexfield with all of specific Contexts
$ FNDLOAD apps/
Please note that PO is the Application Shortname against which descriptive flexfield against PO Headers is registered
PO_HEADERS is the name of Descriptive Flexfield against PO Headers
You can find the details using this script
SELECT application_id, DESCRIPTIVE_FLEXFIELD_NAME, application_table_name
FROM fnd_descriptive_flexs_vl
WHERE APPLICATION_TABLE_NAME like 'PO_HEAD%' ORDER BY APPLICATION_TABLE_NAME
/
To upload into another environment
$FND_TOP/bin/FNDLOAD apps/$CLIENT_APPS_PWD 0 Y UPLOAD $FND_TOP/patch/115/import/afffload.lct XX_PO_HEADERS_DFF.ldt
Concurrent Programs
$ FNDLOAD apps/
Please note that XX_GS_IMP will be your custom Application Shortname where concurrent program is registered
XX_CUST_PROG_IMP Will be the name of your request group
XX_CUST_PROG_IMP.ldt is the file where concurrent program definition will be extracted to upload to the target instance
$ FNDLOAD apps/
Value Sets
FNDLOAD apps/apps@seed115 O Y DOWNLOAD $FND_TOP/patch/115/import/afffload.lct file_name.ldt VALUE_SET FLEX_VALUE_SET_NAME=value set name
Value Sets with values
FNDLOAD apps/apps@seed115 O Y DOWNLOAD $FND_TOP/patch/115/import/afffload.lct file_name.ldt VALUE_SET_VALUE FLEX_VALUE_SET_NAME=value set name
Profile Options
FNDLOAD apps/apps@seed115 O Y DOWNLOAD $FND_TOP/patch/115/import/afscprof.lct file_name.ldt PROFILE PROFILE_NAME=profile option APPLICATION_SHORT_NAME=prod
Requset Group
$ FNDLOAD apps/
Please note that XX_MYGROUP will be your Application Shortname where request group is registered
and XX_REPGROUP_NAME Will be the name of your request group
Next need to upload this Request Group info to the target instance after having transferred the ldt file
FNDLOAD apps/
Request Sets
FNDLOAD apps/apps@seed115 O Y DOWNLOAD $FND_TOP/patch/115/import/afcprset.lct file_name.ldt REQ_SET APPLICATION_SHORT_NAME=prod REQUEST_SET_NAME=request set
Responsibilities
FNDLOAD apps/apps@seed115 O Y DOWNLOAD $FND_TOP/patch/115/import/afscursp.lct file_name.ldt FND_RESPONSIBILITY RESP_KEY=responsibility
Menus
FNDLOAD apps/apps@seed115 O Y DOWNLOAD $FND_TOP/patch/115/import/afsload.lct file_name.ldt MENU MENU_NAME=menu_name
Forms/Functions
FNDLOAD apps/apps@seed115 0 Y DOWNLOAD $FND_TOP/patch/115/import/affrmcus.lct file_name.ldt FND_FORM_CUSTOM_RULES The Upload syntax for all styles: FNDLOAD apps/apps@seed115 0 Y UPLOAD $FND_TOP/patch/115/import/affrmcus.lct file_name.ldt
Responsibilities
$ FNDLOAD apps/
please note that XX_RESPON_NAME is the responsibility key in source instance
Now need to upload this information to target instance after having transferred the ldt file
FNDLOAD apps/
Users
FNDLOAD apps/
When you look at the ldt file, you can find this kind info, and do not worry about password, it will be encrypted only.
BEGIN FND_USER "username"
OWNER = "ANONYMOUS"
LAST_UPDATE_DATE = "2010/01/07"
ENCRYPTED_USER_PASSWORD =
"ZG19D5C2DB16C4F5DD4D5D9A2F0CE3FEEB07BAF9CD0A591B64CA8B357C38EE7B17533B0C00D1DBA278D83E0A8994737B2C63"
SESSION_NUMBER = "3375"
START_DATE = "2007/01/01"
END_DATE = "*NULL*"
LAST_LOGON_DATE = "2010/04/30"
DESCRIPTION = "Name of the user"
PASSWORD_DATE = "2010/01/07"
PASSWORD_ACCESSES_LEFT = "*NULL*"
PASSWORD_LIFESPAN_ACCESSES = "*NULL*"
PASSWORD_LIFESPAN_DAYS = "*NULL*"
EMAIL_ADDRESS = "username@test.com"
FAX = "*NULL*"
To upload the FND_USER using FNDLOAD command use
FNDLOAD apps/
when you upload the FND_USER details with FNDLOAD, need to be complete these actions priorily.
1. After uploading using FNDLOAD, user will be promoted to change their password again during their next signon attempt.
2. All the responsibilities will be extracted by FNDLOAD alongwith User Definition in FND_USER
3. In the Target Environment , make sure that you have done FNDLOAD for new responsibilities,functions, menu, request group etc., prior to running FNDLOAD on users.
Tuesday, 25 May 2010
What should EBS customers running 10gR2 do?
From Mr. Steven Chang blog, Premier Support is running out on both EBS 11i and the 10gR2 database this year, he have recommended that e-business suite 11i customers should start planning upgrades to Oracle E-Business Suite Release 12 immediately with 11gR2 database.
Read more from his blog about this...
Reminder: Premier Support for 10gR2 10.2.0.4 Database ends July 2010
Cheers!!!
Read more from his blog about this...
Reminder: Premier Support for 10gR2 10.2.0.4 Database ends July 2010
Cheers!!!
Monday, 24 May 2010
icxwtab.odf is unable to create index ICX_TRANSACTIONS_U1
Sometime while patching, adpatch fails on script icxwtab.odf with the following errors:
As specified in Metalink Note 430673.1:
ERROR
The table is missing the index ICX_TRANSACTIONS_U1
or index ICX_TRANSACTIONS_U1 exists on another table.
Create it with the statement:
Start time for statement below is: Mon May 07 2007 14:23:44
CREATE UNIQUE INDEX ICX.ICX_TRANSACTIONS_U1 ON ICX.ICX_TRANSACTIONS
(TRANSACTION_ID) LOGGING STORAGE (INITIAL 4K NEXT 104K MINEXTENTS 1
MAXEXTENTS UNLIMITED PCTINCREASE 0 FREELIST GROUPS 4 FREELISTS 4 ) PCTFREE
10 INITRANS 11 MAXTRANS 255 COMPUTE STATISTICS TABLESPACE ICXX
Statement executed.
AD Worker error:
The index cannot be created as the table has duplicate keys.
Use the following SQL statement to identify the duplicate keys:
SELECT TRANSACTION_ID, count(*)
FROM ICX.ICX_TRANSACTIONS
GROUP BY TRANSACTION_ID
HAVING count(*)>1
AD Worker error:
Unable to compare or correct tables or indexes or keys
because of the error above
SPECIFIC DATA
Ran the suggested query, and here is the output:
TRANSACTION_ID COUNT(*)
-------------------------- -------------
148341124 2
431640607 2
555224577 2
1202811809 2
Cause
These duplicate transactions are there because the concurrent program that deletes temporary session data (program that removes old entries in ICX_SESSIONS and ICX_TRANSACTIONS) is not executed on a regular basis. As a result, these tables grow in space and there is the possibility that the sequences cycle and restart, creating duplicate primary keys.
The following justifies how the issue is related to this specific customer:
SELECT TRANSACTION_ID, count(*)
FROM ICX.ICX_TRANSACTIONS
GROUP BY TRANSACTION_ID
HAVING count(*)>1
TRANSACTION_ID COUNT(*)
-------------------------- --------------
148341124 2
431640607 2
555224577 2
1202811809 2
This is explained in the following unpublished bug: Bug 5001287 PERFORMANCE PROBLEM WHEN APPROVING POS WITH ICX_TRANSACTIONS
Solution
To implement the solution, please execute the following steps:
1. Run the purge program:
a. The name of the program is "Purge Inactive Sessions" located under the "Apps for the Web Manager" responsibility.
b. The internal name is ICXDLTMP.
c. Also you can find this SQL script under $ICX_TOP/sql (named ICXDLTMP.sql).
2. Rerun the failed worker (icxwtab.odf).
3. Migrate the solution as appropriate to other environments.
4. This program should be executed at least once a week to clean up ICX_TRANSACTIONS and ICX_SESSION tables, otherwise they will continue to grow.
Saturday, 22 May 2010
Expertise in Oracle Apps...
Well, most of the oracle DBAs are very much interest in learning Oracle Applications 11i or R12. For that, if you have a laptop with 3GB RAM and a spare external hard disc with min 350GB can start this practice. If you are thinking of Linux, VMWare workstation will do the trick to you. Anyhow I am not going into that area in this post.
First of all you need to download all related package from e-delivery
http://edelivery.oracle.com/
(Now only R12.1.1 donwload avaliable there)
Once downloaded your required software package, start with Oracle Apps Documentation.
All the information available for Applications Releases 11i and 12 from this link
http://www.oracle.com/technology/documentation/applications.html
You must read the following documentation before start with oracle applications
Once you get familiar with the architecture and the different components of Oracle Applications, consider the following:
Oracle E-Business Suite R12
Oracle E-Business Suite 11i
For better understanding oracle applications, please read some of the recommended books from the below links.
Oracle Applications DBA Field Guide (Expert's Voice in Oracle)
Oracle Applications DBA Covers 11i and R12
Oracle Applications DBA Field Guide
System Administration for Oracle E-Business Suite (Personal Edition)
If any doubts, you can always get cleared from oracle blogs, there are good source of information for career development.
Always read and update with latest technology from Mr. Steven Chan's blog, this is one of the best blogs available right now for oracle applications users.
Steven Chan's Oracle E-Business Suite Technology
Applications & Apps Technology
Read, learn and practice what you have learned. And of course, post your questions in this OTN discussion forum, there are many experts who are willing to help you.
1. Forum: EBS General Discussion
2. Forum: Technology - LCM: 11i Install/Upgrade
3. Forum: Technology - LCM: R12 Install/Upgrade
Have a nice journey into the world of Oracle Applications 11i - R12
Cheers!
First of all you need to download all related package from e-delivery
http://edelivery.oracle.com/
(Now only R12.1.1 donwload avaliable there)
Once downloaded your required software package, start with Oracle Apps Documentation.
All the information available for Applications Releases 11i and 12 from this link
http://www.oracle.com/technology/documentation/applications.html
You must read the following documentation before start with oracle applications
- Oracle Applications Concepts
- Oracle Applications Installation Guide: Using Rapid Install
- Maintaining Oracle Applications Documentation Set
- Oracle Applications System Administrator's Documentation Set
- System Administrator's Guide - Maintenance
Once you get familiar with the architecture and the different components of Oracle Applications, consider the following:
- Install oracle Apps by yourself.
- Startup/Shutdown Applications
- Set up users/responsibilities/printers/Concurrent Managers etc..
- Practice Cloning and backup procedure
- Apply all kind of patches
- Practice AutoConfig to manage system configurations
- Try to Upgrade Database/Application tiers
Oracle E-Business Suite R12
Oracle E-Business Suite 11i
For better understanding oracle applications, please read some of the recommended books from the below links.
Oracle Applications DBA Field Guide (Expert's Voice in Oracle)
Oracle Applications DBA Covers 11i and R12
Oracle Applications DBA Field Guide
System Administration for Oracle E-Business Suite (Personal Edition)
If any doubts, you can always get cleared from oracle blogs, there are good source of information for career development.
Always read and update with latest technology from Mr. Steven Chan's blog, this is one of the best blogs available right now for oracle applications users.
Steven Chan's Oracle E-Business Suite Technology
Applications & Apps Technology
Read, learn and practice what you have learned. And of course, post your questions in this OTN discussion forum, there are many experts who are willing to help you.
1. Forum: EBS General Discussion
2. Forum: Technology - LCM: 11i Install/Upgrade
3. Forum: Technology - LCM: R12 Install/Upgrade
Have a nice journey into the world of Oracle Applications 11i - R12
Cheers!
What are source environment file settings in Oracle Applications R12
On Linux, Oracle E-Business Suite includes a consolidated environment file called APPS< CONTEXT_NAME>.env, which sets up both the Oracle E-Business Suite and Oracle technology stack environments. When you install Oracle E-Business Suite, Rapid Install creates this script in the APPL_TOP directory. Normally need to source the environment file prior to any upgrade-maintenance task. At that time, you can do this action from the application tier owner user.
Suppose APPL_TOP = /u01/apps/apps_st/appl
. /u01/apps/apps_st/appl/APPS< CONTEXT_NAME >.env
. /u01/apps/apps_st/appl/APPS< CONTEXT_NAME >.env
On Windows, the equivalent consolidated environment file is called %APPL_TOP%\envshell< CONTEXT_NAME >.cmd. Running it creates a command window with the required environment settings for Oracle E-Business Suite. All subsequent operations on the APPL_TOP (for example, running adadmin or adpatch) must be carried out from this window.
Similar to setting up of database environment, you can perform this action from database tier owner user.
Suppose RDBMS_ORACLE_HOME = /u01/oracle/db/tech_st/11.1.0
. /u01/oracle/db/tech_st/11.1.0/< CONTEXT_NAME >.env
. /u01/oracle/db/tech_st/11.1.0/< CONTEXT_NAME >.env
Several other key environment files are used in an Oracle E-Business Suite system.
The adovars.env file
The adovars.env file, located in $APPL_TOP/admin, specifies the location of various files such as Java files, HTML files, and JRE (Java Runtime Environment) files. It is called from the main applications environment file, < CONTEXT_NAME >.env. The adovars.env file includes comments on the purpose and recommended setting of each variable. In a Release 12 environment, adovars.env is maintained by AutoConfig, and should not be edited manually.
The adconfig.txt file
AD utility programs perform a variety of database and file management tasks. These utilities need to know certain configuration information to run successfully. This configuration information is specified when Oracle E-Business Suite is installed, and subsequently stored in the adconfig.txt file in the /admin directory.
The fndenv.env file
This file sets additional environment variables used by the Application Object Library.
For example, it sets APPLBIN as the name of the subdirectory where product executable programs and shell scripts are stored (bin). This file should not be modified: the default values are applicable for all customers. The file is located in the FND_TOP directory.
The devenv.env file
This file sets variables that let you link third-party software and your own custom-developed applications with Oracle E-Business Suite. In Release 12, this script is located in FND_TOP/usrxit, and is automatically called by fndenv.env. This allows you to compile and link custom Oracle Forms user exits and concurrent programs with Oracle E-Business Suite.
Cheers!!!
Friday, 21 May 2010
$INST_TOP - Instance Home
In Oracle E-Business Suite Release 12, Instance Home a concept introduces for a top-level directory for an Oracle E-Business Suite instance. This directory is referred to as the Instance Home, and denoted by the environment variable $INST_TOP. A key benefit of moving to the new Instance Home model is that as AutoConfig no longer writes to the APPL_TOP or ORACLE_HOME directories, both of these can be made into read-only file systems if required. All configuration files created by AutoConfig are stored under the Instance Home. An illustration of Instance Home looks like the following.

Using an Instance Home provides the ability to share application and technology stack code among multiple instances, for example a development instance and a test instance. Other benefits include support for read-only file systems and centralization of log files because of this feature log files can be stored centrally for an instance, and therefore managed more easily. Directory structure used for log files in Release 12, with some of the subdirectories used to categorize the log files: The below picture shows how the log files have been arranged in Instance Home for your understanding.

The basic structure of the instance home is: < APPS_BASE >/inst/apps/< context_name >, where APPS_BASE (which does not have or need a corresponding environment variable) is the top level of the Oracle E-Business Suite installation, and < context_name > is the highest level at which the applications context exists. For example, the setting of $INST_TOP might be < diskresource >/applmgr/inst/apps/testsys2, where testsys2 is the context name.
How to trace a Concurrent Request and generate the TKPROF file.
I hope this document will help you to find-out the long-running concurrent request from an oracle applications 11i/R12.
1. Generate Trace File

Enable Tracing For The Concurrent Manager Program
Select the Enable Trace Checkbox
Note : Checking the Trace Check box on the Concurrent Program gives an Event 10046 Level 8 trace. So even if the trace is set for Binds and Waits on the Submission form once the concurrent program is encountered in the trace it will reset to level 8 so no binds will be present in the trace after that point.
Turn On Tracing
•Responsibility: System Administrator
•Navigate: Profiles > System
•Query Profile Option Concurrent: Allow Debugging
•Set profile to Yes
Run Concurrent Program With Tracing Turned On
•Logon to the Responsibility that runs the Concurrent Program
•In the Submit Request Screen click on Debug Options (B)
•Select the Checkbox for SQL Trace

If the Debug option is greyed out & not updateable set the profile Concurrent: Allow Debugging to Yes
2. Find Trace File Name
Run the following SQL to find out the Raw trace name and location for the concurrent program. The SQL prompts the user for the request id
prompt
accept request prompt 'Please enter the concurrent request id for the appropriate concurrent program:'
prompt
column traceid format a8
column tracename format a80
column user_concurrent_program_name format a40
column execname format a15
column enable_trace format a12
set lines 80
set pages 22
set head off
SELECT 'Request id: '||request_id ,
'Trace id: '||oracle_Process_id,
'Trace Flag: '||req.enable_trace,
'Trace Name:
'||dest.value||'/'||lower(dbnm.value)||'_ora_'||oracle_process_id||'.trc',
'Prog. Name: '||prog.user_concurrent_program_name,
'File Name: '||execname.execution_file_name|| execname.subroutine_name ,
'Status : '||decode(phase_code,'R','Running')
||'-'||decode(status_code,'R','Normal'),
'SID Serial: '||ses.sid||','|| ses.serial#,
'Module : '||ses.module
from fnd_concurrent_requests req, v$session ses, v$process proc,
v$parameter dest, v$parameter dbnm, fnd_concurrent_programs_vl prog,
fnd_executables execname
where req.request_id = &request
and req.oracle_process_id=proc.spid(+)
and proc.addr = ses.paddr(+)
and dest.name='user_dump_dest'
and dbnm.name='db_name'
and req.concurrent_program_id = prog.concurrent_program_id
and req.program_application_id = prog.application_id
and prog.application_id = execname.application_id
and prog.executable_id=execname.executable_id;
To check the timeline of the request :
SELECT request_id, TO_CHAR( request_date, 'DD-MON-YYYY HH24:MI:SS' )
request_date, TO_CHAR( requested_start_date,'DD-MON-YYYY HH24:MI:SS' )
requested_start_date, TO_CHAR( actual_start_date, 'DD-MON-YYYY HH24:MI:SS' )
actual_start_date, TO_CHAR( actual_completion_date, 'DD-MON-YYYY HH24:MI:SS' )
actual_completion_date, TO_CHAR( sysdate, 'DD-MON-YYYY HH24:MI:SS' )
current_date, ROUND( ( NVL( actual_completion_date, sysdate ) - actual_start_date ) * 24, 2 ) duration
FROM fnd_concurrent_requests
WHERE request_id = TO_NUMBER('&p_request_id');
You may produce a complete report reference of the request ID using the Note:187504.1 bde_request.sql Process and Session info for one Concurrent Request(11.5)
3. TKPROF Trace File
Once you have obtained the Raw trace file you need to format the file using TKPROF.
$tkprof raw_trace_file.trc output_file explain=apps/apps sort=(exeela,fchela) sys=no
Where:
raw_trace_file.trc: Name of trace file
output_file: tkprof out file
explain: This option provides the explain plan for the sql statements
sort: This provides the sort criteria in which all sql statements will be sorted. This will bring the bad sql at the top of the outputfile.
sys=no: Disables sql statements issued by user SYS
Another example: To get (TKPROF) sorted by longest running queries first and limits the results to the "Top 10" long running queries
$ tkprof sys=no explain=apps/ sort='(prsela,exeela,fchela)' print=10
1. Generate Trace File

Enable Tracing For The Concurrent Manager Program
Select the Enable Trace Checkbox
Note : Checking the Trace Check box on the Concurrent Program gives an Event 10046 Level 8 trace. So even if the trace is set for Binds and Waits on the Submission form once the concurrent program is encountered in the trace it will reset to level 8 so no binds will be present in the trace after that point.
Turn On Tracing
•Responsibility: System Administrator
•Navigate: Profiles > System
•Query Profile Option Concurrent: Allow Debugging
•Set profile to Yes
Run Concurrent Program With Tracing Turned On
•Logon to the Responsibility that runs the Concurrent Program
•In the Submit Request Screen click on Debug Options (B)
•Select the Checkbox for SQL Trace

If the Debug option is greyed out & not updateable set the profile Concurrent: Allow Debugging to Yes
2. Find Trace File Name
Run the following SQL to find out the Raw trace name and location for the concurrent program. The SQL prompts the user for the request id
prompt
accept request prompt 'Please enter the concurrent request id for the appropriate concurrent program:'
prompt
column traceid format a8
column tracename format a80
column user_concurrent_program_name format a40
column execname format a15
column enable_trace format a12
set lines 80
set pages 22
set head off
SELECT 'Request id: '||request_id ,
'Trace id: '||oracle_Process_id,
'Trace Flag: '||req.enable_trace,
'Trace Name:
'||dest.value||'/'||lower(dbnm.value)||'_ora_'||oracle_process_id||'.trc',
'Prog. Name: '||prog.user_concurrent_program_name,
'File Name: '||execname.execution_file_name|| execname.subroutine_name ,
'Status : '||decode(phase_code,'R','Running')
||'-'||decode(status_code,'R','Normal'),
'SID Serial: '||ses.sid||','|| ses.serial#,
'Module : '||ses.module
from fnd_concurrent_requests req, v$session ses, v$process proc,
v$parameter dest, v$parameter dbnm, fnd_concurrent_programs_vl prog,
fnd_executables execname
where req.request_id = &request
and req.oracle_process_id=proc.spid(+)
and proc.addr = ses.paddr(+)
and dest.name='user_dump_dest'
and dbnm.name='db_name'
and req.concurrent_program_id = prog.concurrent_program_id
and req.program_application_id = prog.application_id
and prog.application_id = execname.application_id
and prog.executable_id=execname.executable_id;
To check the timeline of the request :
SELECT request_id, TO_CHAR( request_date, 'DD-MON-YYYY HH24:MI:SS' )
request_date, TO_CHAR( requested_start_date,'DD-MON-YYYY HH24:MI:SS' )
requested_start_date, TO_CHAR( actual_start_date, 'DD-MON-YYYY HH24:MI:SS' )
actual_start_date, TO_CHAR( actual_completion_date, 'DD-MON-YYYY HH24:MI:SS' )
actual_completion_date, TO_CHAR( sysdate, 'DD-MON-YYYY HH24:MI:SS' )
current_date, ROUND( ( NVL( actual_completion_date, sysdate ) - actual_start_date ) * 24, 2 ) duration
FROM fnd_concurrent_requests
WHERE request_id = TO_NUMBER('&p_request_id');
You may produce a complete report reference of the request ID using the Note:187504.1 bde_request.sql Process and Session info for one Concurrent Request(11.5)
3. TKPROF Trace File
Once you have obtained the Raw trace file you need to format the file using TKPROF.
$tkprof raw_trace_file.trc output_file explain=apps/apps sort=(exeela,fchela) sys=no
Where:
raw_trace_file.trc: Name of trace file
output_file: tkprof out file
explain: This option provides the explain plan for the sql statements
sort: This provides the sort criteria in which all sql statements will be sorted. This will bring the bad sql at the top of the outputfile.
sys=no: Disables sql statements issued by user SYS
Another example: To get (TKPROF) sorted by longest running queries first and limits the results to the "Top 10" long running queries
$ tkprof
Thursday, 20 May 2010
Use of two Oracle Application Server ORACLE_HOMEs in Release 12
In this post I would like to share with you all, the use of two Oracle Application Server ORACLE_HOMEs in Release 12.
Two different Oracle Application Server (OracleAS) 10g releases, in separate ORACLE_HOMEs, are used in Oracle E-Business Suite Release 12. This enables Oracle E-Business Suite to take advantage of the latest Oracle technologies as illustrates in picture, the functional usage of the two Oracle Application Server
ORACLE_HOMEs.

Oracle applications R12 having the features of this architecture include:
• The latest version of Oracle Containers for Java (OC4J), the successor to JServ, is included in Oracle Application Server 10.1.3.
• All major services are started out of the OracleAS 10.1.3 ORACLE_HOME.
• The Oracle E-Business Suite modules (packaged in the file formsapp.ear) are deployed into the OC4J-Forms instance running out of the OracleAS 10.1.3
ORACLE_HOME, while the frmweb executable is invoked out of the OracleAS 10.1.2 ORACLE_HOME.
This picture will show the relationship of the two Application Server ORACLE_HOMEs and the database ORACLE_HOME.

Advantage of this high-level architecture include:
• The Oracle Application Server 10.1.2 ORACLE_HOME (sometimes referred to as the Tools, C, or Developer ORACLE_HOME) replaces the 8.0.6 ORACLE_HOME provided by Oracle9i Application Server 1.0.2.2.2 in Release 11i.
• The Oracle Application Server 10.1.3 ORACLE_HOME (sometimes referred to as the Web or Java ORACLE_HOME) replaces the 8.1.7-based ORACLE_HOME provided by Oracle9i Application Server 1.0.2.2.2 in Release 11i.
What is Transparent Data Encryption (TDE) ?
New in Oracle Database 11g, TDE (Oracle Advanced Security Transparent Data Encryption) allows you to protect data at rest. TDE helps address privacy and PCI requirements by encrypting personally identifiable information (PII) such as Social Security numbers and credit card numbers..
To know more about this please read the blog of Mr. Stevan Chang
TDE Tablespace Encryption 11.2.0.1 Certified with EBS 12
Cheers!
To know more about this please read the blog of Mr. Stevan Chang
TDE Tablespace Encryption 11.2.0.1 Certified with EBS 12
Cheers!
Wednesday, 19 May 2010
Steps To Clean Nonexistent Nodes Or IP Addresses From FND_NODES
This note will help you to clear Nonexistent Nodes Or IP Addresses From FND_NODES.
After completing the ADCLONE process, or implementing Autoconfig, the FND system tables have incorrect values. The OAM Dashboard reflects the target machine name and the source machine name although the source machine is no longer being used. In some cases, there are IP addresses from nonexistent machines in FND_NODES.
The workflow agent listeners fail to start reflecting the following errors posted within the log file:
oracle.apps.fnd.cp.gsc.SvcComponentContainerException:
oracle.apps.fnd.wf.common.ContextFactoryException: Error instantiating AppsContext ->
AOLJ_JAVA_EXCEPTION (MESSAGE=ProfileCache: getLocalJDBCConnection() == null)
AOLJ_JAVA_EXCEPTION (MESSAGE=Not able to create new database connection: FND SQL_PLSQL_ERROR in
FND_SECURITY_PKG.FND_ENCRYPTED_PWD
SECURITY_INVALID_DBC_PARAMETER (PARAMETER=GUEST_USER_PWD)
(FILE=/idg_ldata1/vol01/oracle/prod/prodappl/fnd/11.5.0/secure/PROD_idgdbprod01/prod.dbc)
(ROUTINE=AppsConnectionManager.makeGuestConnection)
ORA-01422: exact fetch returns more than requested number of rows
SQL_PLSQL_ERROR (ROUTINE=FND_SECURITY_PKG.FND_ENCRYPTED_PWD) (ERRNO=-1422) (REASON=ORA-01422:
exact fetch returns more than requested number of rows)
at oracle.apps.fnd.cp.gsc.SvcComponentContainer.getNewWorkflowContext(SvcComponentContainer.java:1321)
Could not start Service Component Container because an unexpected RuntimeException or other
Throwable occurred -> oracle.apps.fnd.cache.CacheException
oracle.apps.fnd.cache.CacheException
at oracle.apps.fnd.cache.AppsCache.get(AppsCache.java:228)
at oracle.apps.fnd.profiles.Profiles.getProfileOption(Profiles.java:1464)
at oracle.apps.fnd.profiles.Profiles.getProfile(Profiles.java:333)
at oracle.apps.fnd.profiles.ExtendedProfileStore.getSpecificProfileFromDB(ExtendedProfileStore.java:210)
Cause
The Nodes in the OAM Dashboard are retrieved from the FND_NODES table. Further investigation showed that the FND_NODES table had both node names and node_modes 'O' as activated.
ie:
SQL> select node_name "Node Name", node_mode "Mode", support_cp "C",
support_web "W", support_admin "A", support_forms "F"
from FND_NODES;
NODE_NAME N S S S S
------------------------------ - - - - -
TARGET O Y Y Y Y
SOURCE O Y Y Y Y
Solution
Do not directly Delete from FND_NODES table because the support_' columns will be affected and will not incorporate the correct information throughout in OAM. As documented in OAM.G Documentation, Note: 226826.1 About Oracle Applications Manager Mini-Pack 11i.OAM.G, the data cleanup issues with cloning that surface in the OAM UI have been fixed in the latest cloning patches.
1. Retrieve the latest patch for the cloning tools: (Currently TXK AUTOCONFIG ROLLUP PATCH T Patch 8217898 for 11i as the writing of this note.)
2. After applying the above patch to the system that is to be cleaned, run the following in SQL*Plus. Note that this will delete all data from system tables such as FND_NODES, FND_OAM_CONTEXT_FILES, etc. The correct information for the current system will be repopulated when AutoConfig is run.
SQL> EXEC FND_CONC_CLONE.SETUP_CLEAN;
COMMIT;
EXIT;
3. Run AutoConfig on all tiers, firstly on the DB tier and then the APPS tiers, to repopulate the required system tables.
How to generate a stack trace for forms with Applications 11i - R12
Sometimes, troubleshooting forms issues such as FRM-92100, it is often useful to generate a stack trace. Steps follow to produce a stack trace for forms in 11i environment.
1. Set the following environment variables:
a) check the value of $FORMS60_TRACE_PATH and make sure this directory has write permissions and has space.
b) set $FORMS60_CATCHTERM=0
2. If your platform is Unix, check that the operating system ulimit values are sufficient.
Run `ulimit -a` as the applmgr, assuming applmgr starts the forms server, to check the memory, data and stack sizes.
3. Stop the forms server.
4. Backup file f60webmx and then relink this executable with debug symbols.
Make sure you are signed in as the user who owns f60webmx executable, then run this command:
adrelink.sh force=y ranlib=y link_debug=y "fnd f60webmx"
5. Start the forms server.
6. Reproduce the forms error that you are investigating.
7. Check for a new core file in the following directories:
a) $FORMS60_TRACE_PATH directory.
or
b) check the $PWD directory for the forms server.
By default in an Autoconfig enabled environment, this is the directory in which the adfrmctl.sh starts;
$PWD is $COMMON_TOP/admin/scripts// directory.
To confirm the $PWD directory setting, you can also check by opening any form and navigating to
Help->Diagnostics->Examine
In field 1 select $environment$
In field 2 enter PWD (no $ or quotes)
The value is populated automatically when you select the tab key.
or
c) $FND_TOP/bin directory.
7. If you identify a file with a corresponding timestamp to that of when the error occurs, follow
the steps in metalink Note 1812.1 to generate a stack trace.
Follow the steps to produce a stack trace for forms in R12 environment.
Please work with the users reporting the FRM-92100 error and see if each time the issue occurs you are getting under this dir $FORMS_TRACE_DIR on forms node a file called
frmweb_dump_
Where PID is the process ID of the user running the form session.
You can ask user to identify the PID this way:
Open any form and go to Help->About Oracle Applications
You should see something like this
----------------------------------------
Forms Server
----------------------------------------
Oracle Forms Version : 10.1.2.0.2
Application Object Library : 12.0.0
Machine : R12.APPS.LOCAL
Forms User CPU (secs) : 0.363949
Forms System CPU (secs) : 0.150981
Forms Process ID : 1246
Here the form process is 1246
If the above information is not present, you need to set profile 'FND: Diagnostics' to Yes.
The process 1246 can be seen on forms node
ps -ef | grep 1246
oracle 1246 1523 0 09:55 ? 00:00:00 /oracle/VIS/apps/tech_st/10.1.2/bin/frmweb server
webfile=HTTP-0,0,1,default,192.168.100.4
as you can see there is the client IP listed 192.168.100.4 also which can be a confirmation that client is the one you expect.
If when the FRM-92101 error is raised on the client PC, please check if the process is still
running on the server
ps -ef | grep 1246
If not, please check $FORMS_TRACE_DIR for
frmweb_dump_ file and see when it's created in this case it's called frmweb_dump_1246.
If the process is dead and frmweb_dump_ file is created you need to get a core file
under the same circumstances:
1. Change FORMS_CATCHTERM=0 in $INST_TOP/ora/10.1.2/forms/server/default.env
2.Stop the services on the middle tier and relink forms executables with debug symbols on
a) cd $ORACLE_HOME/forms/lib; make -f ins_forms.mk sharedlib
b) cd $ORACLE_HOME/forms/lib; make -f ins_forms.mk install
c) adrelink.sh force=y link_debug=y "fnd fndfmxit.so"
d) adrelink.sh force=y link_debug=y "fnd fndrwxit.so"
Then start them again
On 64-bit platforms you might find ins_forms.mk file under $ORACLE_HOME/forms/lib32 directory instead.
3. Confirm in any forms session that changes have taken effect by going to
Help->Diagnostics->Examine
In 'Block' field enter $ENVIRONMENT$
In 'Field' field enter FORMS_CATCHTERM and hit tab.
In the 'Value' field you will see the value and this value should be 0
The purpose of all these steps is to generate a core dump file. If FORMS_CATCHTERM is set to 1 no core dump is generated, and instead you get a text frmweb_dump_ in $FORMS_TRACE_DIR without much infrmation. If FORMS_CATCHTERM is set to 0 a binary core dump file will be generated either under $FORMS_TRACE_DIR or under PWD dir. You can find the PWD directory this way.
Open any form and go to Help->Diagnostics->Examine
In 'Block' field enter $ENVIRONMENT$
In 'Field' field enter PWD and hit tab.
In the 'Value' field you will see the value where core dump file is generated.
4.Once this core dump is generated (look for a file named core, a simple ls *core* under PWD or $FORMS_TRACE_DIR will be enough) we can use it to get a stack trace as per Note 1812.1. This stack trace should be the one you upload in the TAR so we can see whether you are facing some known bug due to which forms process crashes. Try to see if there is a pattern with all forms processes that crash.
1. Set the following environment variables:
a) check the value of $FORMS60_TRACE_PATH and make sure this directory has write permissions and has space.
b) set $FORMS60_CATCHTERM=0
2. If your platform is Unix, check that the operating system ulimit values are sufficient.
Run `ulimit -a` as the applmgr, assuming applmgr starts the forms server, to check the memory, data and stack sizes.
3. Stop the forms server.
4. Backup file f60webmx and then relink this executable with debug symbols.
Make sure you are signed in as the user who owns f60webmx executable, then run this command:
adrelink.sh force=y ranlib=y link_debug=y "fnd f60webmx"
5. Start the forms server.
6. Reproduce the forms error that you are investigating.
7. Check for a new core file in the following directories:
a) $FORMS60_TRACE_PATH directory.
or
b) check the $PWD directory for the forms server.
By default in an Autoconfig enabled environment, this is the directory in which the adfrmctl.sh starts;
$PWD is $COMMON_TOP/admin/scripts/
To confirm the $PWD directory setting, you can also check by opening any form and navigating to
Help->Diagnostics->Examine
In field 1 select $environment$
In field 2 enter PWD (no $ or quotes)
The value is populated automatically when you select the tab key.
or
c) $FND_TOP/bin directory.
7. If you identify a file with a corresponding timestamp to that of when the error occurs, follow
the steps in metalink Note 1812.1 to generate a stack trace.
Follow the steps to produce a stack trace for forms in R12 environment.
Please work with the users reporting the FRM-92100 error and see if each time the issue occurs you are getting under this dir $FORMS_TRACE_DIR on forms node a file called
frmweb_dump_
Where PID is the process ID of the user running the form session.
You can ask user to identify the PID this way:
Open any form and go to Help->About Oracle Applications
You should see something like this
----------------------------------------
Forms Server
----------------------------------------
Oracle Forms Version : 10.1.2.0.2
Application Object Library : 12.0.0
Machine : R12.APPS.LOCAL
Forms User CPU (secs) : 0.363949
Forms System CPU (secs) : 0.150981
Forms Process ID : 1246
Here the form process is 1246
If the above information is not present, you need to set profile 'FND: Diagnostics' to Yes.
The process 1246 can be seen on forms node
ps -ef | grep 1246
oracle 1246 1523 0 09:55 ? 00:00:00 /oracle/VIS/apps/tech_st/10.1.2/bin/frmweb server
webfile=HTTP-0,0,1,default,192.168.100.4
as you can see there is the client IP listed 192.168.100.4 also which can be a confirmation that client is the one you expect.
If when the FRM-92101 error is raised on the client PC, please check if the process is still
running on the server
ps -ef | grep 1246
If not, please check $FORMS_TRACE_DIR for
frmweb_dump_
If the process is dead and frmweb_dump_
under the same circumstances:
1. Change FORMS_CATCHTERM=0 in $INST_TOP/ora/10.1.2/forms/server/default.env
2.Stop the services on the middle tier and relink forms executables with debug symbols on
a) cd $ORACLE_HOME/forms/lib; make -f ins_forms.mk sharedlib
b) cd $ORACLE_HOME/forms/lib; make -f ins_forms.mk install
c) adrelink.sh force=y link_debug=y "fnd fndfmxit.so"
d) adrelink.sh force=y link_debug=y "fnd fndrwxit.so"
Then start them again
On 64-bit platforms you might find ins_forms.mk file under $ORACLE_HOME/forms/lib32 directory instead.
3. Confirm in any forms session that changes have taken effect by going to
Help->Diagnostics->Examine
In 'Block' field enter $ENVIRONMENT$
In 'Field' field enter FORMS_CATCHTERM and hit tab.
In the 'Value' field you will see the value and this value should be 0
The purpose of all these steps is to generate a core dump file. If FORMS_CATCHTERM is set to 1 no core dump is generated, and instead you get a text frmweb_dump_
Open any form and go to Help->Diagnostics->Examine
In 'Block' field enter $ENVIRONMENT$
In 'Field' field enter PWD and hit tab.
In the 'Value' field you will see the value where core dump file is generated.
4.Once this core dump is generated (look for a file named core, a simple ls *core* under PWD or $FORMS_TRACE_DIR will be enough) we can use it to get a stack trace as per Note 1812.1. This stack trace should be the one you upload in the TAR so we can see whether you are facing some known bug due to which forms process crashes. Try to see if there is a pattern with all forms processes that crash.
Forms Process (FRMWEB) Consumes 100% of CPU in Oracle Applications R12
On Oracle Applications R12 when checking the top processes on the OS level for the middle tier, you find that forms process (frmweb) almost consumes 100% of the CPU. The root cause of the issue is that returning rows from LOVs in core forms causes the forms process to grow up into memory depending on the number of rows returned.
When an end user login to forms and start working with LOV within core forms sometimes and according to the search criteria that the user will provide to filter the results in LOV, it may fetch huge numbers of records in which causes the frmweb process to grow very large, and in extreme cases this can even lock up the current process or even the whole machine.
So when executing a LOV query, every row is fetched into memory on the middle tier, the frmweb process can get extremely large, and the larger it gets the more likely it is to start paging. Eventually it starts consuming excessive CPU just paging the process in and out of memory, which is probably what you can see here in this case as the amount of memory consumed when the LOV records are fetched into memory obviously depends on the amount of data in each record.
Solution
To implement the solution, please execute the following steps:
1. Stop all services on the middle tier.
2. Set following forms environment variables:
FORMS_RECORD_GROUP_MAX to 10000 or if that proves too restrictive, increase it to 20000 or 30000.
FORMS_CATCHTERM=0
In order to set the above forms variables so next time autoconfig run does not override those values, do the following steps :
1- For Forms Variable "FORMS_CATCHTERM" the context vairable name is: "s_forms_catchterm" and you can update the context file located in ($INST_TOP/appl/admin/)
2- For other forms variable "FORMS_RECORD_GROUP_MAX" there is no variable defined in Autoconfig for that one and have to customize the autoconfig for the forms variables to set that environment as following:
a) Go to the autoconfig Template folder:
$cd $AD_TOP/admin/template
b) Create new directory named (custom)
$ mkdir custom
c) Make sure that new directory has same file permissions as ($AD_TOP/admin/template)
d) Copy the following autoconfig template to the new custom directory:
$cp $AD_TOP/admin/template/APPLSYS_ux.env $AD_TOP/admin/template/custom/APPLSYS_ux.env
e) Edit the file copied file under custom directory and add the following 2 lines at the end of section:
####################################
# Oracle Forms environment variables
####################################
FORMS_RECORD_GROUP_MAX=10000
export FORMS_RECORD_GROUP_MAX
f) Save and exit from the file.
g) Next time autoconfig run, it will read the custom directory and check for any customizations there.
3. Run Autoconfig on the middle tier and make sure it is completed successfully.
4. Startup all services.
5. Monitor the forms process to see its CPU usage, and you will see that form process usage is reduced and not causing any more CPU consumption up to 100% as before.
6. Migrate the solution as appropriate to other environments.
When an end user login to forms and start working with LOV within core forms sometimes and according to the search criteria that the user will provide to filter the results in LOV, it may fetch huge numbers of records in which causes the frmweb process to grow very large, and in extreme cases this can even lock up the current process or even the whole machine.
So when executing a LOV query, every row is fetched into memory on the middle tier, the frmweb process can get extremely large, and the larger it gets the more likely it is to start paging. Eventually it starts consuming excessive CPU just paging the process in and out of memory, which is probably what you can see here in this case as the amount of memory consumed when the LOV records are fetched into memory obviously depends on the amount of data in each record.
Solution
To implement the solution, please execute the following steps:
1. Stop all services on the middle tier.
2. Set following forms environment variables:
FORMS_RECORD_GROUP_MAX to 10000 or if that proves too restrictive, increase it to 20000 or 30000.
FORMS_CATCHTERM=0
In order to set the above forms variables so next time autoconfig run does not override those values, do the following steps :
1- For Forms Variable "FORMS_CATCHTERM" the context vairable name is: "s_forms_catchterm" and you can update the context file located in ($INST_TOP/appl/admin/
2- For other forms variable "FORMS_RECORD_GROUP_MAX" there is no variable defined in Autoconfig for that one and have to customize the autoconfig for the forms variables to set that environment as following:
a) Go to the autoconfig Template folder:
$cd $AD_TOP/admin/template
b) Create new directory named (custom)
$ mkdir custom
c) Make sure that new directory has same file permissions as ($AD_TOP/admin/template)
d) Copy the following autoconfig template to the new custom directory:
$cp $AD_TOP/admin/template/APPLSYS_ux.env $AD_TOP/admin/template/custom/APPLSYS_ux.env
e) Edit the file copied file under custom directory and add the following 2 lines at the end of section:
####################################
# Oracle Forms environment variables
####################################
FORMS_RECORD_GROUP_MAX=10000
export FORMS_RECORD_GROUP_MAX
f) Save and exit from the file.
g) Next time autoconfig run, it will read the custom directory and check for any customizations there.
3. Run Autoconfig on the middle tier and make sure it is completed successfully.
4. Startup all services.
5. Monitor the forms process to see its CPU usage, and you will see that form process usage is reduced and not causing any more CPU consumption up to 100% as before.
6. Migrate the solution as appropriate to other environments.
Tuesday, 18 May 2010
Database Initialization Parameters for Oracle Applications 11i - R12
The following metalink note will help you setting init.ora parameters for EBS suite databases
Note: 216205.1 - Database Initialization Parameters for Oracle Applications Release 11i
Note: 396009.1 - Database Initialization Parameters for Oracle Applications Release 12
These note will helps you when upgrade your system to R12 from 11i, or managing these instances.
Note: 216205.1 - Database Initialization Parameters for Oracle Applications Release 11i
Note: 396009.1 - Database Initialization Parameters for Oracle Applications Release 12
These note will helps you when upgrade your system to R12 from 11i, or managing these instances.
How to solve One-to-One Fulfillment Server Processes Remain in Memory after being Shutdown
In Linux, a One-to-One Fulfillment server (Ver: 11.5.10 to 11.5.10.2) process may be seen remain in memory after the fulfillment server has been shutdown.
In order to stop Fulfillment, the server needs to make sure it is done processing any jobs in progress, release its DB connections, stop and release its threads, and perform any other cleanup. Therefore shutdown is not instantaneous. The script jtffmctl.sh returns after it issues the shutdown command to Fulfillment, but its return does not indicate that the process has stopped.
Solution to the above the workaround, please execute the following steps:
Edit the adstpal.sh script to call the One-to-One Fulfillment server script to stop the second time
OR
Just shutdown One-to-One Fulfillment server as a separate step after the adstpal.sh script is run by running the following command
$jtffmctl.sh stop
Monday, 17 May 2010
XML Publisher and R12
In this post, I would like to share the way of register report with Oracle XML Publisher. This will change the look and feel of the reports. It provides mechanism merge the template files and data to produces the nice document that can be viewed in at the client through PDF or Excel sheet.
1. In this example I have copied the concurrent request "Active Responsibilities and Users" and saved it as "XML Active Responsibilities and Users"
Step-by-step:
System Administrator -> Concurrent -> Program -> Define
Query Program "Active Responsibilities and Users"
Click the "Copy To" Button
Program : XML Active Responsibilities and Users
Short Name: XMLPFNDSCARU
Application: Application Object Library
select Include Incompatible Programs
select Include Parameters
Click OK


Save
2. Add your new concurrent program to the existing request group
System Administrator -> Security -> Responsibility -> Request
Query Group: System Administrator Reports
Application: Application Object Library
Add new Request:
Program: XML Active Responsibilities and Users
Save

Follow the steps to create XML output from applications
Requests - > Submit -> XML Active Responsibilities and Users
Once completed successfully, save this output file as XMLP_ActiveResponsibilities.xml.
 4. Create the Template file using Microsoft Word (should be install and configure with Oracle XML Publisher Client) and save it as XMLP_ActiveResponsibities.rtf (RTF - Rich Text Format).

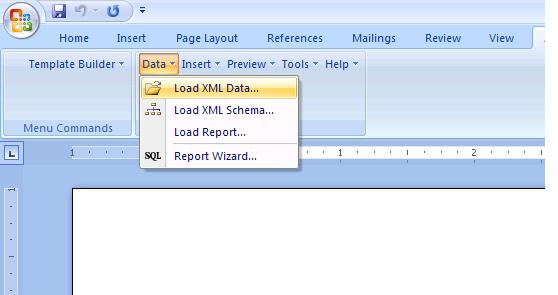


Refer Oracle® XML Publisher, Report Designer's Guide, Release 12, Part No. B31410-01
5. Define XML Publisher Data Definition and Template
XML Publisher Administrator -> Data Definitions
Click Create Data Definition
Name: XML Active Responsibilities and Users
Code: XMLPFNDSCARU
Application: Application Object Library
Click Apply

XML Publisher Administrator -> Data Definitions
Click Create Data Definition
Name: XML Active Responsibilities and Users
Code: XMLPFNDSCARU
Application: Application Object Library
Click Apply

6. XML Publisher Administrator -> Templates
Click Create Template
Name: XML Active Responsibilities and Users
Code: XMLPFNDSCARU
Application: Application Object Library
Data Definition: XML Active Responsibilities and Users
Type: RTF
Click File, Browse and upload your RTF templates file XMLP_ActiveReponsibilites.rtf created earlier
Language: English
Click Apply


7. Now you have to run the request from applications.
System Administrator -> Requests -> Run
Name: XML Active Responsibilities and Users
Submit
This is the output from this concurrent request

Also refer the documents which come along with R12 document set to create charts, reports etc.
Oracle® XML Publisher, Administration and Developer's Guide, Release 12, Part No. B31412-01
Oracle® XML Publisher, Report Designer's Guide, Release 12, Part No. B31410-01
Metalink Notes:
Note 362496.1
Note 364547.1
I hope you all got a fair idea of how this BI publisher works with oracle apps R12.
Oracle® XML Publisher, Administration and Developer's Guide, Release 12, Part No. B31412-01
Oracle® XML Publisher, Report Designer's Guide, Release 12, Part No. B31410-01
Metalink Notes:
Note 362496.1
Note 364547.1
I hope you all got a fair idea of how this BI publisher works with oracle apps R12.
Subscribe to:
Posts (Atom)