Tuesday 30 November 2010

OBIEE 11g Linux - But required Admin Tool on Windows, How to solve?

After successful intallation of OBIEE 11g on linux box, I am thinking about Admin tool.exe on my laptop, but required Windows box to run that. As a work around, did a fresh installation of OBIEE 11g software again on my local Windows XP machine. After than I have copied the admin tool.exe along 'server' folder from C:\[OBIEE_PATH]\bifoundation

As a first step, I have created same directory structure OBIEE 11g installation path of local machine to my laptop and then copied all the files.
Next step, i have created a cmd file for register all the DLL files from C:\[OBIEE_PATH]\bifoundation\bin directory with regsvr32 /s option. This will help to register all these DLLs in single a command. (If anybody required this information, don't hesitate to leave your request with valid email id)

After that from my local machine, exported two registry entries.
1. [HKEY_LOCAL_MACHINE\SOFTWARE\ODBC\ODBCINST.INI\ODBC Drivers]
2. [HKEY_LOCAL_MACHINE\SOFTWARE\ODBC\ODBCINST.INI\Oracle BI Server 11g_OH741068320]

I have made some changes to the first reg exported file, because its required only Oracle BI Server entry info. So that removed unnecessary lines from first reg exported file. And its look like

[HKEY_LOCAL_MACHINE\SOFTWARE\ODBC\ODBCINST.INI\ODBC Drivers]
"Oracle BI Server 11g_OH741068320"="Installed"

After that added these entries to my laptop using

regedit /s [exported file name]

Finally created one ODBC Connection to laptop pointing to the Linux box DB. Now I can able to open my RPD file in offline as well as online

Cheers!!!
SocialTwist Tell-a-Friend

TNS-12557: TNS:protocol adapter not loadable

Yesterday, I have installed OBIEE11g to my laptop. Installation was successful and working fine to me. But after that I have encountered issues connecting to the database using my existing connection string. I have added these db connection string to the OBIEE11g home tnsnames.ora file but no luck.
I have did some work around, firstly checked my TNSPING, but the result showing as below
So I have checked my PATH setting and discovered the original PATH setting missing my old Oracle Home details. This below is my present PATH environment setting.

PATH=C:\Program Files\PC Connectivity Solution\;C:\WINDOWS\system32;C:\Middlewar
e\Oracle_BI2\bin;C:\Middleware\Oracle_BI2\opmn\bin;C:\Middleware\Oracle_BI2\opmn
\lib;C:\Middleware\Oracle_BI2\perl\bin

After experimentation revealed that my exiting TNS_ADMIN and bin directory has been missing from PATH environment, so I have decided to add the existing directory and now its looks like. (close the command window and open another one)

PATH=C:\OraHome_1\bin;C:\OraHome_1\network\ADMIN;C:\Program Files\PC Connectivit
y Solution\;C:\WINDOWS\system32;C:\Middleware\Oracle_BI2\bin;C:\Middleware\Oracle_BI2\opmn\bin;C:\Middleware\Oracle_BI2\opmn\lib;C:\Middleware\Oracle_BI2\perl\bin
As a result of this path setting, again open one command window (startup->cmd) and tried with same command. Now its working fine
Simple but spend some time to identify the issue.


Cheers!!!
SocialTwist Tell-a-Friend

Thursday 25 November 2010

Install & Configuration of OBIEE 11g

I would like to share my experience of installation of OBIEE 11g on linux with you all.
There are four steps

  1. Oracle Enterprise Linux 5.5 Installation
  2. Oracle Database 11g R2 Installation
  3. Repository Creation Utility
  4. and Oracle Business Intelligence 11g Installation
Once you have restarted your linux box, do the following steps for startup
How to startup OBIEE 11g on linux

Cheers!!!
SocialTwist Tell-a-Friend

Oracle 11g R2 Patchset 1 (11.2.0.2) installation on OEL 5.5

Please makes sure that the following or later versions of packages are successfully installed along with operating system. These are pre-requisite for oracle 11g installation.

binutils-2.17.50.0.6
compat-libstdc++-33-3.2.3
elfutils-libelf-0.125
elfutils-libelf-devel-0.125
elfutils-libelf-devel-static-0.125
gcc-4.1.2
gcc-c++-4.1.2
glibc-2.5-24
glibc-common-2.5
glibc-devel-2.5
glibc-headers-2.5
kernel-headers-2.6.18
ksh-20060214
libaio-0.3.106
libaio-devel-0.3.106
libgcc-4.1.2
libgomp-4.1.2
libstdc++-4.1.2
libstdc++-devel-4.1.2
make-3.81
numactl-devel-0.9.8.i386
sysstat-7.0.2

To use ODBC, you must also install the following additional 32-bit ODBC RPMs, depending on your operating system:
unixODBC-2.2.11 (32-bit) or later
unixODBC-devel-2.2.11 (32-bit) or later

Modify of add these entries in /etc/sysctl.conf using vi editor
fs.aio-max-nr = 1048576
fs.file-max = 6815744
kernel.shmall = 2097152
kernel.shmmax = 536870912
kernel.shmmni = 4096
kernel.sem = 250 32000 100 128
net.ipv4.ip_local_port_range = 9000 65500
net.core.rmem_default = 262144
net.core.rmem_max = 4194304
net.core.wmem_default = 262144
net.core.wmem_max = 1048586

If necessary, update the resource limits in the /etc/security/limits.conf configuration file for the installation owner. For example, add the following lines to the /etc/security/limits.conf file:

oracle              soft    nproc   2047
oracle              hard    nproc   16384
oracle              soft    nofile  1024
oracle              hard    nofile  65536
oracle              soft    stack   10240

Modify or add the following entry in /etc/pam.d/login using vi editor

session required pam_limits.so

Next create the group and user for oracle database

/usr/sbin/groupadd -g 500 oinstall
/usr/sbin/groupadd -g 501 dba
/usr/sbin/groupadd -g 502 oper
/usr/sbin/useradd -u 500 -m -g oinstall -G dba,oper oracle
id oracle
passwd oracle

Create the installation directory for oracle installation
mkdir -p /u01/oracle
chown -R oracle:dba /u01/oracle
chmod -R 775 /u01/oracle

Create staging directory for oracle installation
mkdir -p /u01/stage
chown -R oracle:dba /u01/stage

After unzipping the installation files change to the directory containing uninstaller. You must be the oracle user (not root) and you must verify your shell is set correctly. As the oracle user and start the Oracle installer.
$ cd /u01/stage/database
$./runInstaller.
You can ignore this email setting

You can skip software updates

From installation option, select create and configure a database.

From the server class, choose server class
For a standalone database choose the first option.
Choose Install type as Advance Install.
Database Edition should be Enterprise Edition.
As we created earlier, choose /u01/oracle as Base and Software location will be similar to the below picture
This database is for OBIEE 11g, so please choose Data Warehousing
Here you can edit your database name.
If this database is for demo purpose, so I have to keep with minimum configuration
You can choose File System. But if you are planning for ASM refer configuration details from installation document.
Better to choose the second option this time.

Accept the defaults
This is a typical result. Based on your OS configuration, please read the oracle Installation documents for more info.
The following information is good for future reference.

This will take some time to complete. Be ready for that…

Now the database creation is going on.
Finally database configuration success. If you want to change the password, you can use Password Management button.
From this screen, will prompt to do two things. As a root, you have executed these commands.
Now database 11gR2 (11.2.0.2) is ready for use.


Cheers!!!
SocialTwist Tell-a-Friend

Repository Creation Utility - OBIEE 11g

Download V22398-01.zip  from edelivery.oracle.com Oracle Fusion Middleware Repository Creation Utility 11g (11.1.1.3.3) for Linux x86. To extract the contents of the zip file to the staging directory
Here I have created one user called applmgr for OBIEE installation
When you have unzipped V22398-01.zip, this will produce a directory called rcuHome. Change the directory to rcuHome/bin and start the Repository creation utility using
$ ./rcu
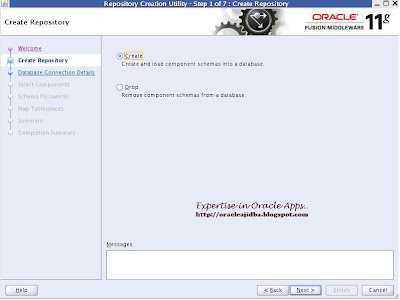
Click on Next in the first RCU screen. Choose the create option and click on Next
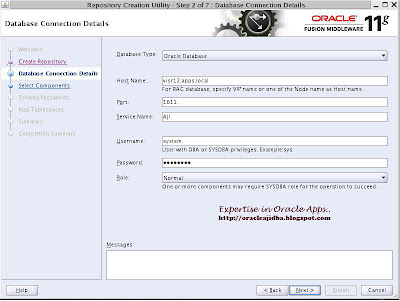
In the next screen, enter the following details
Hostname :
Port       : 1611
Service Name : AJI
username           : system
Password : use the same password as the one that was given at the time of installation of 11g DB
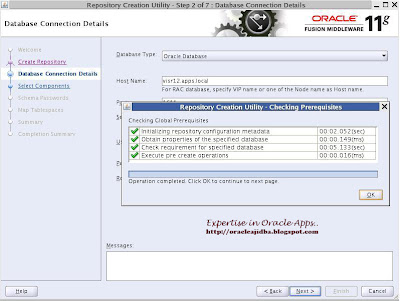
This will do a pre-requisite check, click on OK to proceed.
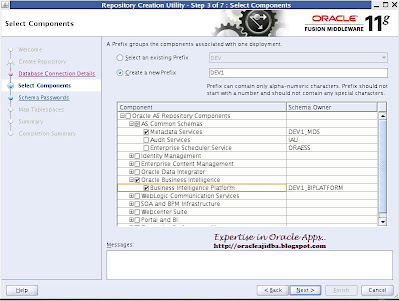
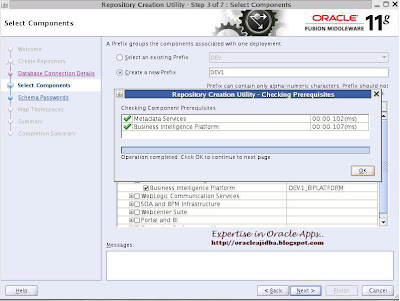
Choose the Oracle Business Intelligence option, this will automatically enable the Metadata services, Click on Next
Click OK in the next screen in the next screen Enter password and Click on Next
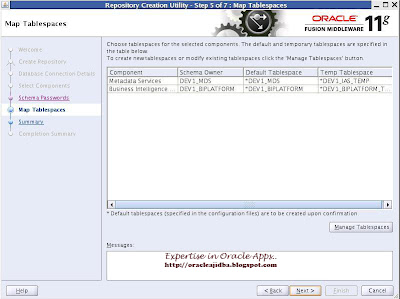
Leave the default values as is, click on Next
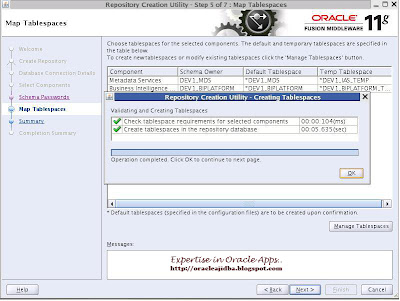
Click OK to create the suggested tablespaces

Click on OK once the tablespaces have been successfully created.

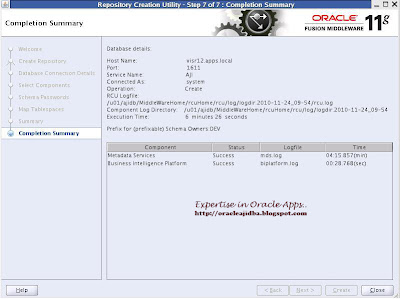
Once completed click on Close to finish the RCU process.


  1. Oracle Enterprise Linux 5.5 Installation
  2. Oracle Database 11g R2 Installation
  3. Oracle Business Intelligence 11g Installation

Cheers!!!
SocialTwist Tell-a-Friend

OBIEE 11g installation on OEL 5.5


Download  the following  from edelivery.oracle.com
Oracle Business Intelligence 11g (11.1.1.3.0) for Linux x86 (32-bit) (Disc 1 of 2) V22330-01 Part 1 of 2
Oracle Business Intelligence 11g (11.1.1.3.0) for Linux x86 (32-bit) (Disc 1 of 2) V22330-01 Part 2 of 2
Oracle Business Intelligence 11g (11.1.1.3.0) for Linux x86 (32-bit) (Disc 2 of 2) V22331-01 Part 1 of 2
Oracle Business Intelligence 11g (11.1.1.3.0) for Linux x86 (32-bit) (Disc 2 of 2) V22331-01 Part 2 of 2
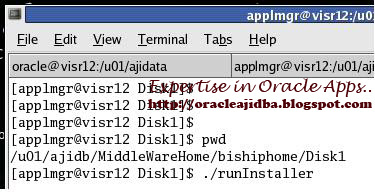
Extract these four zip files, will create a folder called bishiphome and under that four Disks. To lunch the OBIEE 11g installation, goto bishiphome/Disk1
$./runInstaller
Click on Next in the first screen
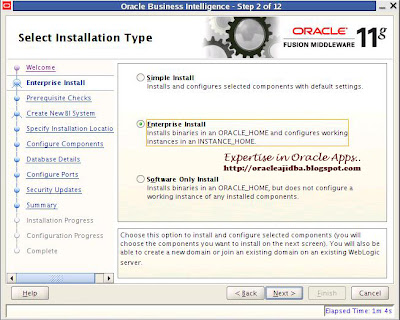
Choose Enterprise Install option and then click on Next
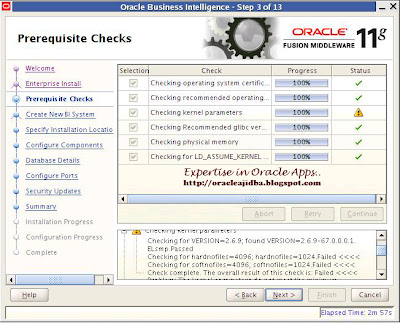
Ensure that all the pre-requisite checks are passed 100%. Click on next
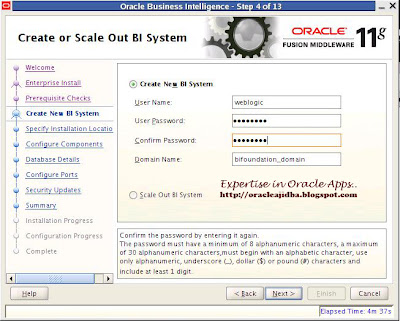
Choose the Create New BI System option. Enter the password. Leave the username and the domain with the default values. Then click on Next
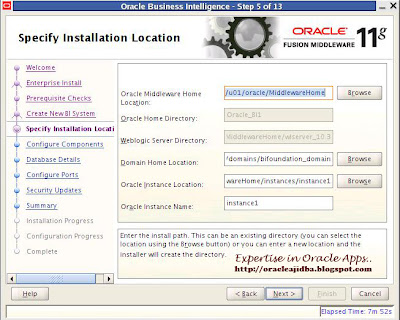
Enter the /u01/oracle/MiddlewareHome as the Middleware Home location. This will automatically fill the remaining fields. Leave those values with the defaults and click on Next
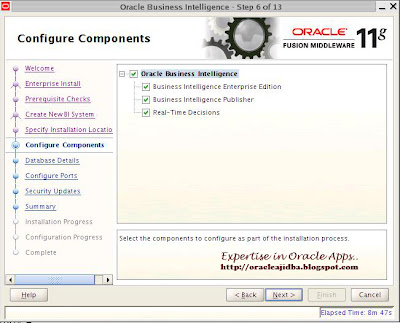
Leave the next screen with default options (all components enabled). Click on Next
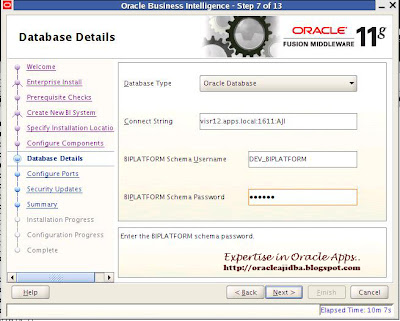
On the database details screen, enter the details of your database and  BIPLATFORM username and password, click on Next to proceed.
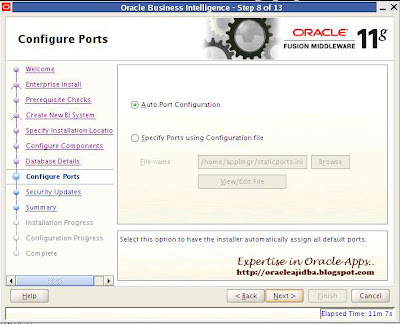
Choose the default Auto Port option and click on Next
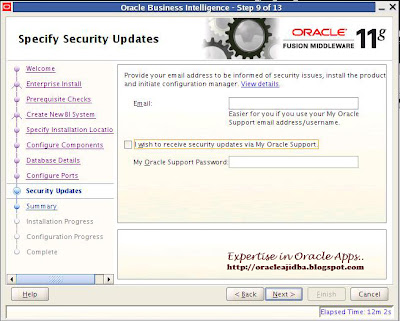
Disable the I wish to receive Security Updates option and click Next
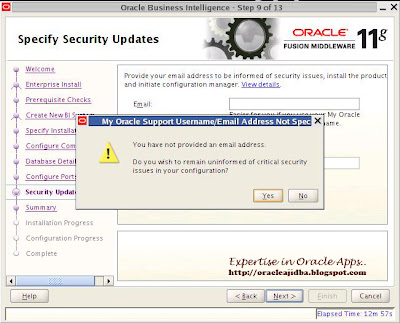
Click Yes in the confirmation pop-up window
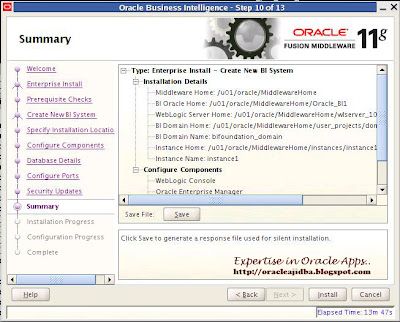
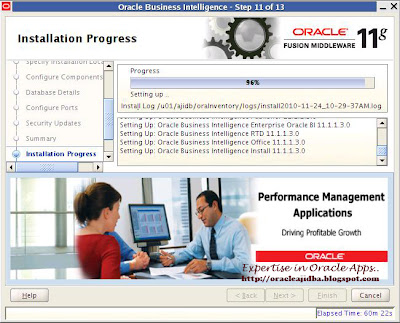
Click on Install
The first step in the install process will copy the install files into Middleware Home. This will take sometime to complete.

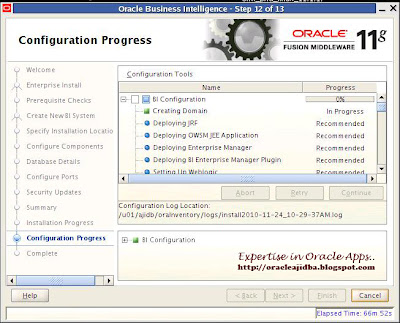
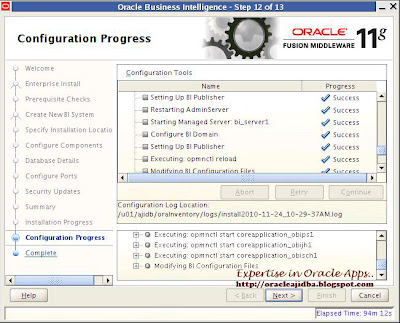
After copying, the configuration process will start. Ensure that all the components are configured correctly.
After the configuration is complete click on Next
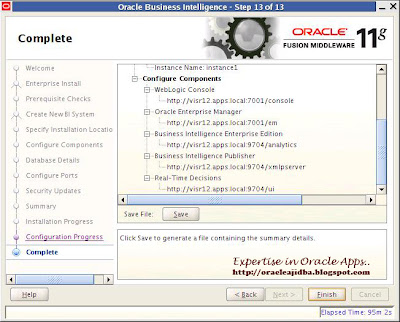
This screen will get all the details of the services started.
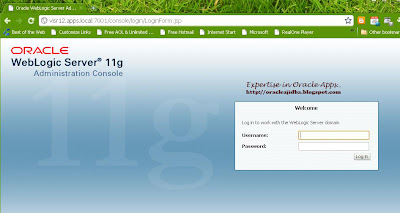
Now using web browser, naviagte to http://visr12.apps.local:7001/console. When prompted, enter weblogic as the username and enter the password when the you given at the time of installation.

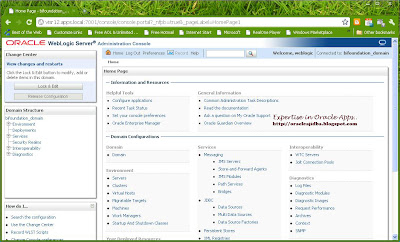
After logging in, click on the bifoundation_domain link.

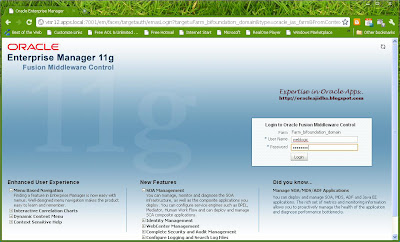
Now using web browser, naviagte to http://visr12.apps.local:7001/em. This will open up the login window of the Enterprise Manager Fusion Middleware Control. Again type in weblogic as the username and password at the time of installation. 
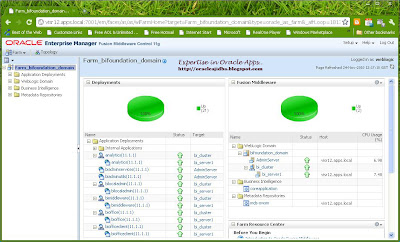
Navigate to the Business Intelligence folder and click on coreapplication
Now access analytics using http://visr12.apps.local:9704/analytics
For accessing Bi Publisher Enterprise, http://visr12.apps.local:9704/xmlpserver


  1. Oracle Enterprise Linux 5.5 Installation
  2. Oracle Database 11g R2 Installation
  3. Repository Creation Utility

Now the installation of OBIEE 11g is completed successfully. I will write the steps for startup and shutdown these services in the next post.

Cheers!!!
SocialTwist Tell-a-Friend